- Lightroom Presets
- Lightroom Brushes
- Mobile Presets
-
Photoshop
-
Learn
-
Support
-
Install
- Blog

The lasso tool is one of several selection tools used in Photoshop and Photoshop Elements and is great to use when you need to select of a particular area of your image. The Photoshop lasso tool is also my favorite selection too!
Remember the basic rule of selection tools - you are selecting an area you want changed and (usually) the area INSIDE your selection will be the area changed.

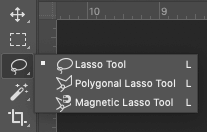
To use the lasso, simply press the ‘L’ key (Photoshop shortcut) on your keyboard, move your mouse to an area on the image, then trace around the area you want to alter. After you let up, you will see moving dotted lines, or “marching ants.” Lassoing an area is pretty straight forward. You click the tool, then draw around the area you want selected.
When using any of the selection tools on a portrait, it is important to know that you must “feather” or “refine” the edge. This will blend the changes you apply to the selection into the pixels around them.
For instance, if you want to select a person’s face so you can brighten it, or there is a color cast on the face/neck that you want to fix, you will definitely want to feather your selection.

You will need to set the feather setting FIRST, before making the selection!
What should your feather settings be?
If you are not paying attention to the feather, your edited area will probably stand out, with a defined start and stop. Or, if your feather is too large, the edit may only be applied to a very small part of your selection and with too much blending.
Just remember that the feather setting is an important part of making a selection in Photoshop or Photoshop Elements.
I don't know about you, but I often don't get my selections "right" the first time so this little tip helps me quite often. If you did not get all of the area you wanted initially, or there are multiple areas that are not connected, you can easily add to and/or make adjustments to your selection with the "Add to" or "Subtract From" options available with the Lasso Tool.
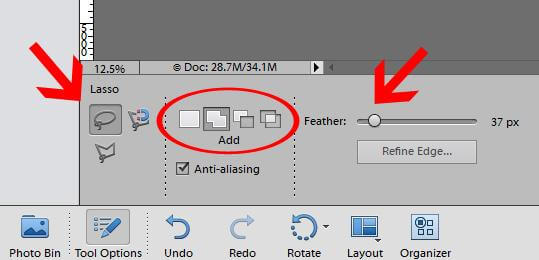
To ADD to your selection, activate the Lasso Tool and then choose icon that looks like a two squares merged together. This will allow you to choose multiple areas in the image to be selected at the same time.
To SUBTRACT from your selection, activate the Lasso Tool and then choose the icon that looks like one solid square and one transparent square. Anything you select with this icon selected will be removed from your previous selection.

Reminder: Don't forget to set your feather BEFORE you make your selection.
After you set the feather, and make your selection, then you can create your adjustment/filter. With adjustment layers, you will notice that the adjustment creates a black mask, and ONLY the area selected will show the change. However, you can utilize your brush and draw out the change in other areas if you need to.
If you want to try this on your own, follow these steps:
You can use the lasso tool to do so many things. There are just too many to list, but here are some of my favorites:
Lets look at a couple of these in more detail:
One way to use Photoshop's Lasso tool is to add a pop of color to a small area of your image. Grab your Lasso tool and set to an appropriate feather.
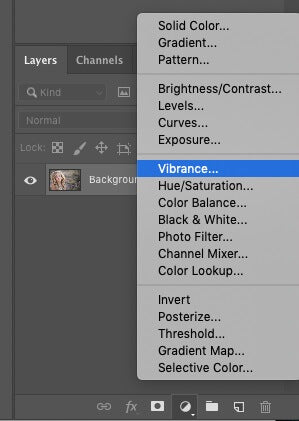
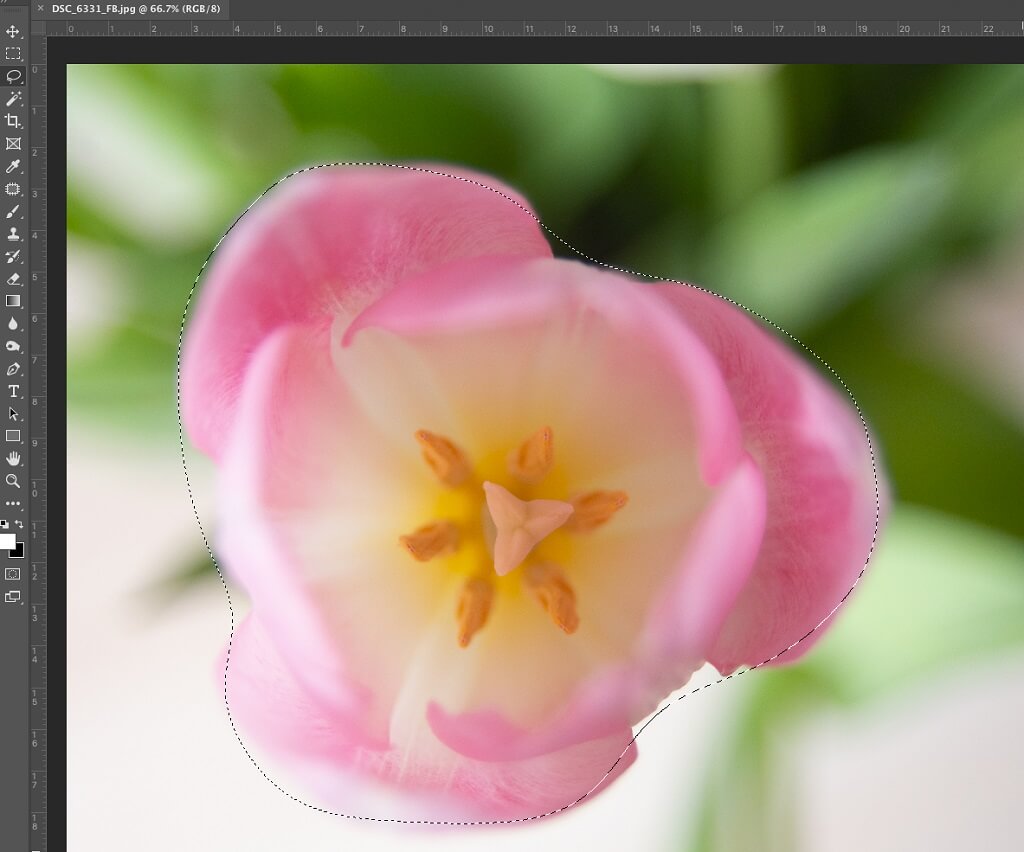
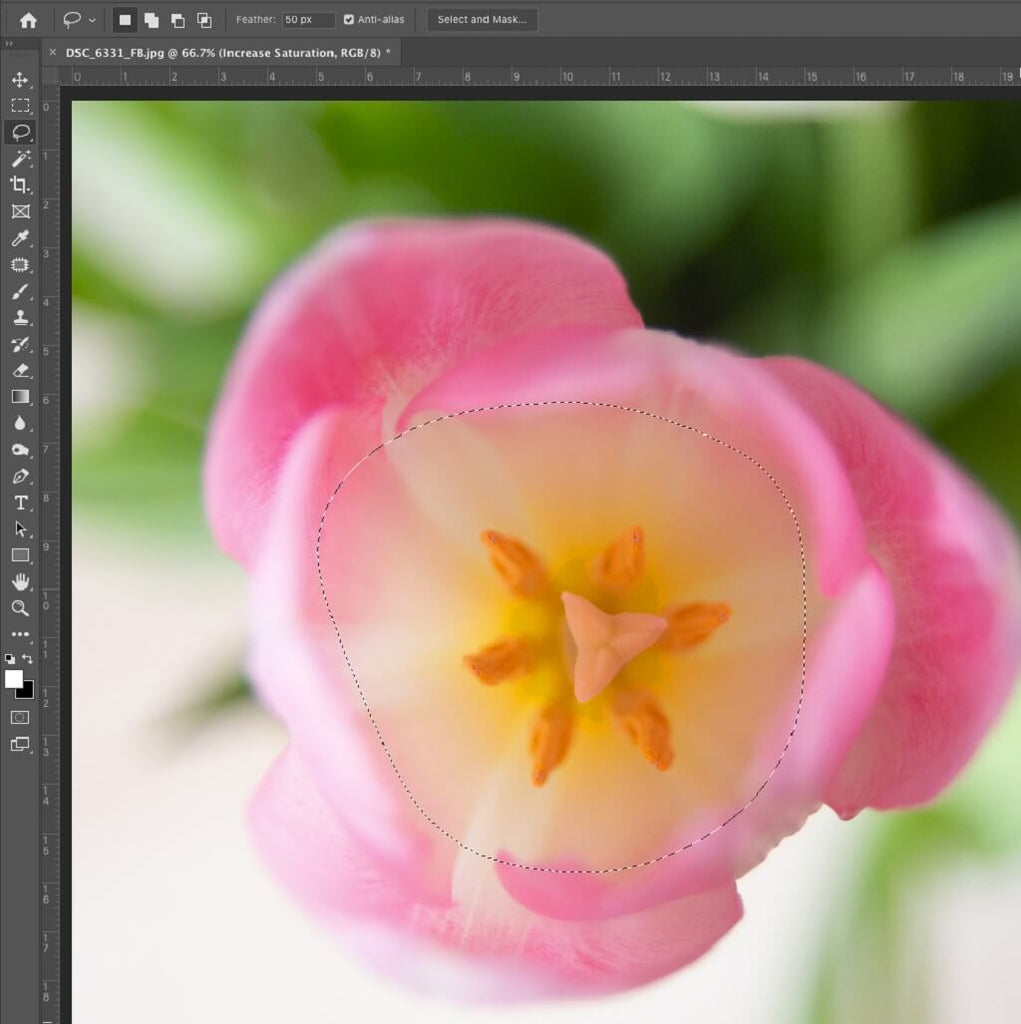
I used a feather of around 50 and lassoed the pink flower (see image below), then did a Hue/Saturation adjustment layer. I simply increased the saturation a bit and reduced the lightness a bit. I wanted the area I selected to be more pink and this was the result:
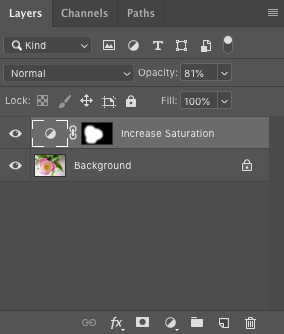
Look at the layer in the screenshot below named "Increase Saturation", you can see the area I selected above is now a white area surrounded by black.
If you have another areas you want to pop with that same change, make sure the mask layer is selected (black and white layer). Select your brush tool and make sure you are painting with white over the areas that you want included. For instance, I could use a brush to include the green leaves.
Note: If you are not getting the color pop results you want with Hue and Saturation adjustment layer, use Levels and go into the color channels and tweak that way.
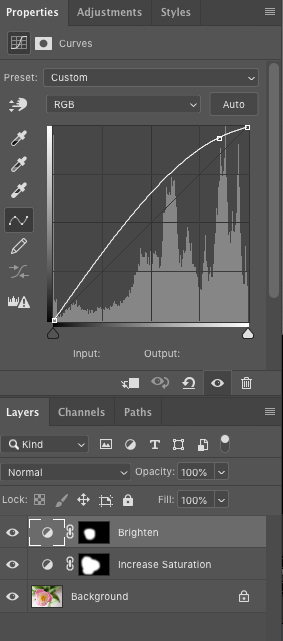
The Lasso Tool can also be used to select a small area that you want to brighten. In this same image, I wanted to brighten the inside of the tulip. I kept the same feather amount of 50 and selected the inner area of the tulip.
Then I chose a Curves Adjustment Layer (Layer>New Adjustment Layer>Curves). I clicked close to the top of the curve (these are the highlights) and dragged the curve upward.
Another situation you might use the Lasso Tool in combination with Adjustment Layers is when trying to reduce color cast on your subject's skin. In the image below, I noticed some extra redness on my subject's cheek that I wanted to decrease.
I started by selecting the Lasso Tool and set my Feather to 20 since its a smaller area.
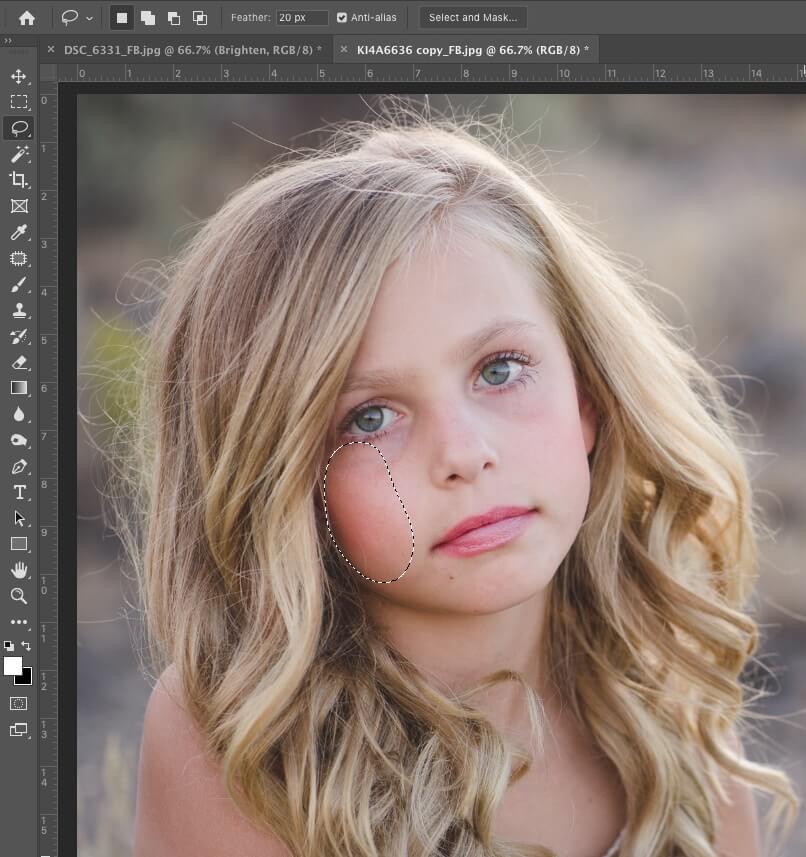
Next, I selected the Hue/Saturation and adjusted the saturation of the reds. After making the adjustment, I saw a few other areas around her eyes that I thought could benefit from this same adjustment.
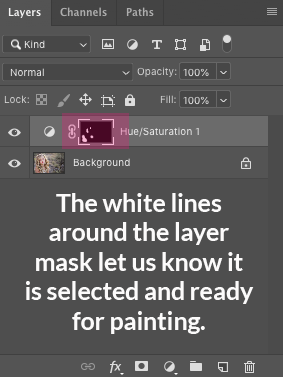
I made sure that the layer mask was selected, then opened my brush tool and made sure that my foreground color was set to white. I then painted over those small areas on her face.
I have found that the Photoshop Lasso Tool is a very important and indispensible selection tool that for making all sorts of great adjustments to particular selected areas of an image. Give it a try and I'm sure you will love it too!
Do you have any questions or comments about the Photoshop Lasso Tool? Leave us a comment below - we would LOVE to hear from you! And PLEASE SHARE our tutorial using the social sharing buttons (we really appreciate it)!


Comments