Welcome to part 3 of my portrait touch-up series, where I use one picture and edit it from start to finish. The last two tutorials were done in Photoshop CS6, but today we are using Photoshop Elements (10).
As we did with the Eye Enhance tutorial, we are building on past edit steps using a picture of my sister, Kirstie. I saved the layers of the past edit, so I opened up the .psd file (saved in Photoshop CS6) in Photoshop Elements.
That was one thing I wanted to make a point of showing….adjustment layers I used in CS6 and saved were able to be opened in PSE because the programs are THAT SIMILAR. So often those with Photoshop CS# think they don’t know anything about PSE but they do! And, those with PSE think they know nothing about Photoshop, but they do!! So any tools, filters, layers, etc are the same for both programs.
Okay, I’m off that tangent so let’s move forward with the tutorial.
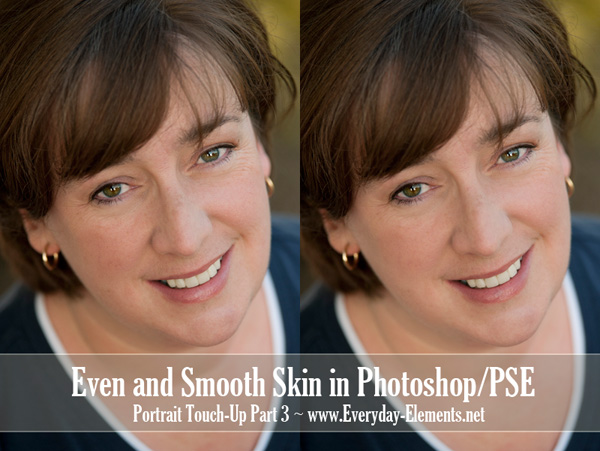
My goal for this next phase of the edit was to even out her skin tone, both on her face and neck, smooth the skin, touch up the lips and cheeks. How did I accomplish that?
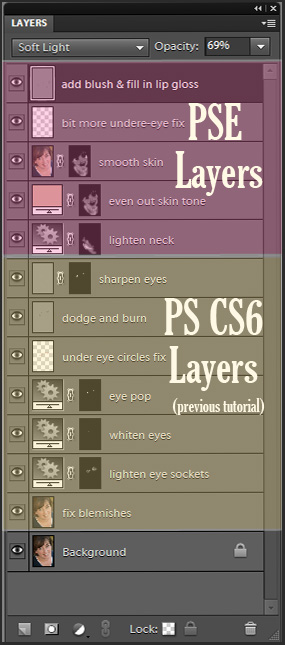
- Levels to lighten the neck area a bit more
- Solid color adjustment layer to blend the skin tones a bit
- Median filter applied to smooth the skin
- Dodge & burn layer to fill in lip gloss and blush just a tad
The stamp layer I used is a combination of shift+control+alt+e (shift+command+option+e on a Mac), while on the top layer. I copied the layer mask with a combination of steps shown in a tutorial on copying layer masks.
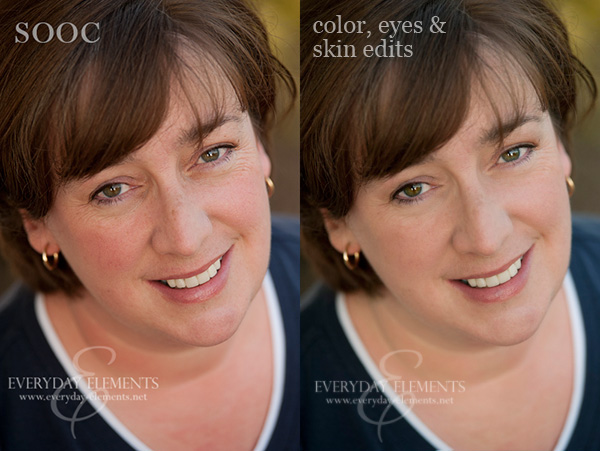
Below is the straight out of the camera shot and the image with the color correct, eye enhance and skin evening/smoothing edits.
No, I have not fixed every little thing I could have, but I chose not to. The object is not to make the picture perfect, but rather to make the picture the best picture of Kirstie that still looks realistic and stays true to who she is.
Did you miss the first two part of this series? The first one was Correcting Color in Photoshop (or PSE), and the second was Enhancing Eyes in Photoshop (or PSE).
Want to see the steps show in this tutorial done in real time? Below is a video tutorial which can be viewed on all mobile devices (may take a few moments to play) and in all browers. If you are viewing this tutorial via a blog reader or email subscription, you will need to click over to the actual post to see it.
***************************************************





I loved the Clean Edit tutorial, but this one was super frustrating. My solid fill layer just looked white and covered everything. I couldn’t see skin to check the skin tone at all. And the slash didn’t make anything red. That layer stayed white the entire time. I googled around for what I might be doing wrong, but couldn’t figure it out. What did you do to make the white solid color adjustment layer go away so you could do the next step?