written by Beckie of beckiegkengle.com
Hey all! It’s been a while since I’ve posted here. I have had a busy few months and needed to take a little break, but I am back! I hope you will enjoy my new posts!
Today I am doing an action edit using “Olympia” from the Everyday Elements Road Trip action set.
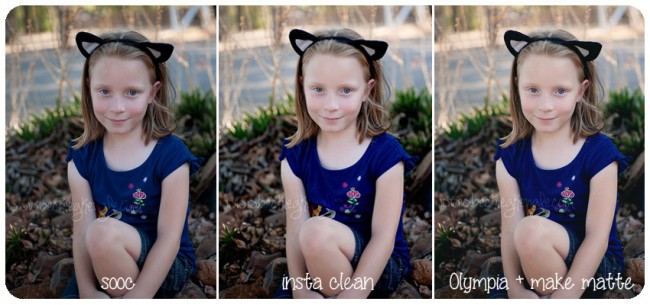
Here was my edit workflow for this image:
- First off, I started with “gradual light” from the Everyday Essentials action set. I chose ‘top light’ and set it at 57% opacity.
- Next I used “InstaClean” (also from the Everyday Essentials action set). I adjusted the ‘levels bump’ layer down to 47%, and the ‘warming’ layer to 25%. Then I saved my clean edit (the middle image shown above).
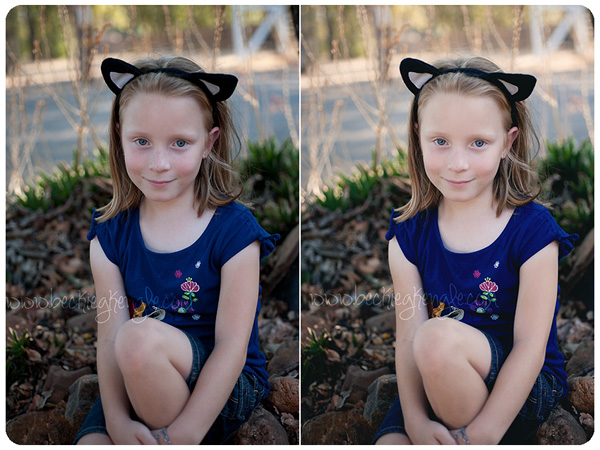
- Now to get just a little bit more artistic, I used the “Olympia” action from the Road Trip set. It was just a little bright for me, so I unchecked the ‘brighten’ layer. And I only made two other adjustments. I brought the opacity down to 54% on the ‘color shift’ layer and 17% on the ‘cool light’ layer.
- And the last little edit I did was to use “make matte” from the Everyday Essentials set. I set the opacity to 50%, though I think I might have preferred it around 65%-75%. But I still love the end result!
Using actions from Everyday Elements is a great (and very easy) way to enhance your images! If you haven’t already, go check out the Everyday Elements action shop! There are actions for basic editing (adjusting white balance, skin smoothing, eye brightening, etc), and actions for artistic edits (color shifts, and black & whites)! The editing possibilities are endless!
Thank you for reading! If you enjoyed my post, and would like to follow my photography, feel free to head over to my blog, or find me on Facebook!


Dearest Beckie,
You did an excellent job in explaining and in editing this lovely photo!
Enjoy your photography with such lovely subject.
Hugs,
Mariette
Thank you so much, Mariette! 🙂