This post is by Andrea Thomas of Speechless Photography.
Fall is always a busy time for photographers. Everyone wants to take advantage of the beautiful autumn colors and cooler weather, not to mention the timing is perfect for getting a few great shots for the Christmas card. But Mother Nature is fickle and no matter how hard you try to schedule everything just right, sometimes things just don’t work out quite how you had planned.
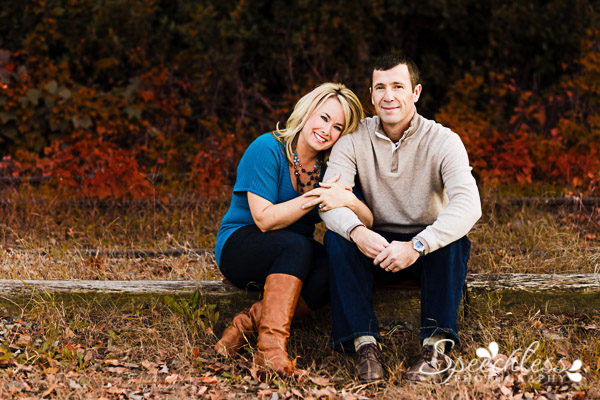
Luckily, the Hue/Saturation adjustment layer in Photoshop Elements makes it easy to fake a little fall when your clients show up looking great but those vivid autumn colors fail to cooperate. Here is my original image.
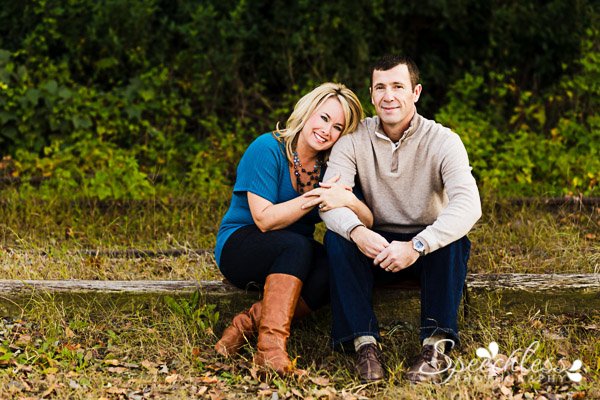
Check out all that green! This photo just doesn’t say fall at all…
I started by adding a Hue/Saturation adjustment layer to create a light orange color in the background foliage. Even though the leaves look green, they actually are mostly controlled by the yellow color range, so I changed the channel in the adjustment dialog box from Master to Yellow and played around with the Hue setting until I found something I liked. Then I masked the adjustment completely off my clients and partially off of the grass in the foreground (since in real life the grass doesn’t usually change color as much as leaves). I ended up with the Yellow channel Hue set to -44 and changed the overall layer opacity to 45%. Because the green was so strong in my original image, I did also end up changing the Green channel to -80 to pick up a few extra spots that stayed green even after adding the Yellow adjustment. This green channel setting is also being used in all the other examples, as well.
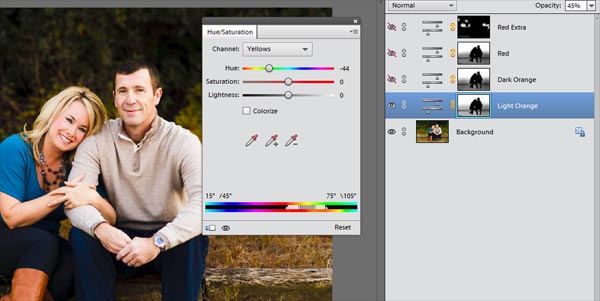
Light Orange Adjustment Layer
It’s starting to look a little more like fall after that adjustment!
Light Orange Adjustment Layer Result
But let’s go a little further and see what we can do. Next I went for a deeper, darker orange color in the background. I created another Hue/Saturation layer with the same layer mask as what I was using for my original Yellow adjustment layer (see the PSE Quick Tip at the bottom of this post for easy ways to do that) so that the adjustment only affected the background and not my clients in the photo. This time I decided to play with the Master channel to see what it could do. I ended up with the Hue set to -28 and the layer opacity set to 50% to get a darker orange color that I really liked.
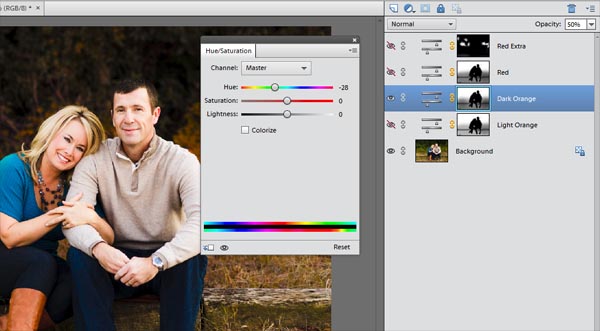
Dark Orange Adjustment Layer
Here is my dark orange result. Now we’re talking! Those colors are really giving the image a warm, autumn feel! Because the darker orange effect was a little stronger than the light orange, I also masked it a little more off of the grass in the foreground with a large, soft black brush.

Dark Orange Adjustment Layer Result
But maybe orange isn’t your thing and you seek out brilliant crimson leaves for your session when the weather starts to cool. No problem, we can do that, too! To get a beautiful red result, I used the Yellow channel again, this time setting the Hue to -73 and the layer opacity to 60%, again masking off of the grass in the foreground more than in the light orange example.
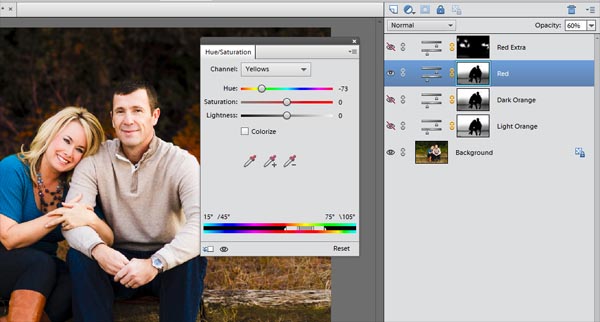
Red Adjustment Layer
Hello, scarlet! Now this photo makes me want to break out a plaid scarf and roast a few marshmallows… I tried to keep the effect at a realistic level, but you can just increase the layer opacity for an even more vivid red color.

Red Adjustment Layer Result
So what if you like the color, but want to add a little more punch to just a few places in the background? No problem! For the next example, I left my red adjustment layer visible and duplicated the layer with the exact same settings. Then I brushed over the whole mask with a large black brush to completely hide the adjustment. Next I used a smaller, soft white brush to paint just a few spots in the background where I wanted that extra red to be applied. In the image below, I’m showing the adjustment that I made to the Green channel that I mentioned in the very first example, but remember that I have the Yellow channel hue set to -73, as well.
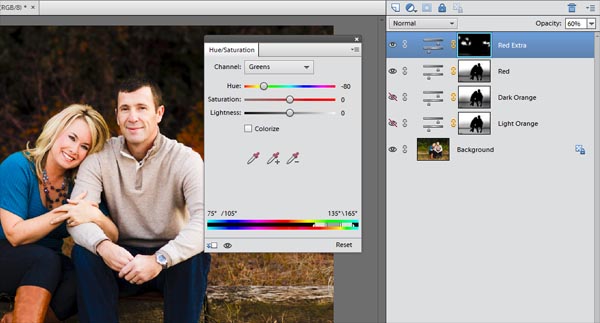
Extra Red Adjustment Layer Brushed On Only In Specific Spots
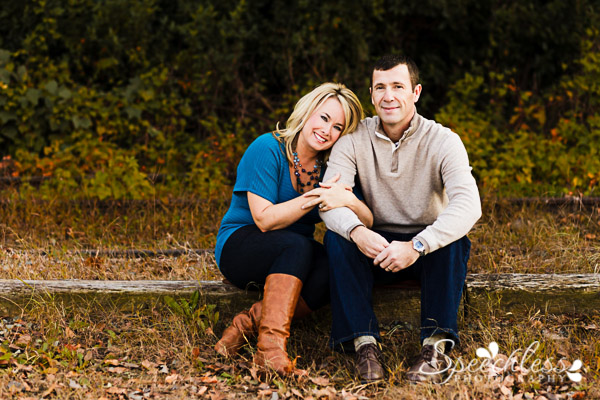
Here is the result of that extra adjustment, brushed on to the image only in specific places.
Extra Red Adjustment Layer Brushed On Result
I think I like this image the best of all! That extra red brushed on makes the background more dynamic with some additional variation in the depth of the color.
While the settings that I used in my examples should give you a decent starting place, they aren’t set in stone. Take some time to play around with different channels and hue settings to see what kind of results you can get. You can also get really creative and brush completely different adjustments on various parts of your image to get a colorful, variegated look. You can go subtle and natural by keeping your layer opacity low or go all out and push it up. The possibilities really are endless when it comes to the effects that you can create with this!
So if you have some images with lots of green that need to say “Fall!” instead, remember that the Hue/Saturation adjustment layer can be your new best friend.
PSE Quick Tip – Reusing an existing layer mask:
When creating my new adjustment layers, I just copied my original adjustment layer using CTRL-J (CMD-J on a MAC) so that I didn’t have to redo my mask and then removed my now-unneeded adjustment layer (just click the “eye” beside the layer to hide it if you don’t want to actually delete it).
Another option would be to hold CTRL and click your original mask to select it before adding a new Hue/Saturation layer. This will create the new layer with the same layer mask as the one you selected.
Are you looking for Photoshop actions to enhance your fall? Be sure to check out the Falling Leaves Overlays & Actions over at Pretty Photoshop Actions!


[…] Add a Little “Faux Fall” with PSE – 1 freebie(s)? […]