This post is by Andrea Thomas of Speechless Photography.
It seems that more and more often newborn photos feature fabric-wrapped babies suspended from tree branches or perched on rocks above a waterfall (ok, maybe I’m exaggerating a little on the last one – but not by much).
As clients and fans ooh and aah over daring poses and improbable scenarios, photographers are pushing the envelope to be the one to produce the next jaw-dropping photo to go viral. But somewhere along the line, some photographers have forgotten the crucial fact that newborns are fragile, delicate, and incredibly precious little human beings. They are not inanimate props and it is never worth putting a baby in danger to get a picture.
It is important to understand that in many of the amazing newborn images you see by professional photographers, there is some element of Photoshop “magic” going on behind the scenes. If those photos are done safely, then those tiny little toes never actually left the ground (or came anywhere close to that rushing waterfall).
In one of my recent newborn sessions, a few of the images could only safely be done as composites. A composite is most easily created by supporting the subject from different positions and then masking out the support in Photoshop, leaving only the unsupported sides visible in the final image.
If you are a photographer and you don’t understand how to safely pose baby then you need to study and learn before you ever take the chance with having a real baby in front of your camera. Watch videos online, find a mentor, do whatever you need to do to gain that knowledge, but please don’t ever put a baby at risk.
One of the simplest tips I can offer is that you should wear your camera strap while shooting. I will often stand and shoot down on my subject and wearing my camera strap around my neck eliminates the possibility of dropping my camera on the baby.
Baby posed on a beanbag with an assistant just outside of the frame
Anytime that a baby is being posed above the ground, for example on a beanbag or bed, it is important to have a spotter nearby. Usually this is a great task for mom or dad, since I am sure they will want to watch their adorable little one during their very first photoshoot. Babies can startle easily, and while they won’t normally roll on their own at this age, if the baby is placed on even a slight incline, it is possible. Also, be sure that the baby’s mouth and nose are clear of any blankets or cushions. Don’t let them bury their face in whatever soft surface you are posing them on. Mom and Dad will also be able to appreciate seeing that cute face in your pictures, instead of it being covered up.
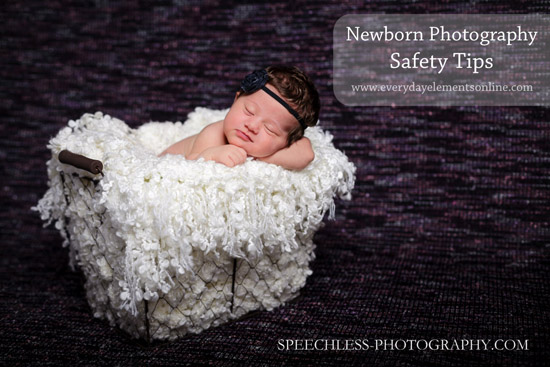
When using a basket or bucket, always keep a spotter within hands reach of the baby. I also weight all my baskets and buckets by placing patio bricks in the bottom to prevent them from tipping over. Make sure all rough or sharp surfaces are covered and will not come into contact with the baby’s sensitive skin. Use folded blankets to pad sharp edges where baby will be resting.

Baby posed in a basket weighted with patio bricks and padded with numerous blankets, my assistant is again just outside of the frame
Don’t ever place a baby in anything breakable. Glass jars, bowls and vases are major hazards and simply should not be used.
If you want to do a shot where the baby is “suspended in the air,” using a wrap or blanket like a hammock, the best way to do this is to lay the wrap on your beanbag which has been covered in whatever fabric you want to use as your background. Then place the baby on the wrap and have your helpers stretch the sides of the wrap to create the appearance that the weight of the baby is pulling on the wrap. This way you can get the “suspended” look without the baby ever having to be unsupported.
If you want it to appear that there is more open space below the baby than this method will allow you, you can also use a ball or other small, weighted object as a stand in for the baby, have your helpers hold the wrap up in the air using that object to stretch the wrap, and then create a composite between these two shots. Unfortunately, I don’t have a photo example of this because, for me personally, I have found that simple poses work the best in my sessions.
I have created a Pinterest board of newborn composite shots, full of ideas and tips, so please check that out for more examples.
Now that all that is out of the way, on to how the magic happens! The photo below is a little deceiving. You can’t really tell it because of the angle from which I took the shot, but the baby is actually leaning back slightly so that she is supported by the blankets behind her and not placing weight on her delicate hands. I took 2 photos, one where her arms were supported and another where her head was supported. Then I combined them in Photoshop to create the finished image on the left.
 and baby supported in the images used to create it (right)")
Finished composite (left) and baby supported in the images used to create it (right)
I am sad to say that I have recently seen a well-respected photography resource suggest that an “experienced” photographer can get the “head in hands” pose without doing a composite. No matter how much experience I have or how comfortable I am with my newborn sessions, it will never be worth it to me to take a chance of harming a baby, especially when a composite is so easy to do. I hope that you will also agree that it just isn’t worth the risk.
In the rocking horse photo below, I created a soft cushion using multiple layers of blankets and then supported the baby at all times. I took a picture with the baby being held on the right side and then another with the support on the left side. Then I again combined them in Photoshop, using only the clear side of each photo to create the composite image. Because I was working in a small space, I also needed to extend my background to make it look seamless from side to side. Finally it was time for a little fun, adding texture and a quote to finish it up.

Composite of baby posed on rocking horse padded with blankets
Another thing to remember is that you should never attempt to do shots like these unless the baby is deeply asleep. Trying to pose a fitful, restless baby, even with support, will only result in frustration for you and potential danger for them. Know when to take a break, often a restless baby just needs a snack and some snuggles before calming down.
If you are the parent of a newborn, be present during your newborn photography session. Don’t be afraid to ask questions and don’t automatically assume that the photographer is always 100% right. Find an experienced newborn photographer and make sure they know their stuff. If you feel uncomfortable about how your baby is being handled at any time, let the photographer know.
If you are an experienced newborn photographer, please be sure to share any other newborn safety tips you may have in the comments!
Those who are brand new to newborn photography, check out the post we have sharing lots of newborn photography basics.


Speak Your Mind