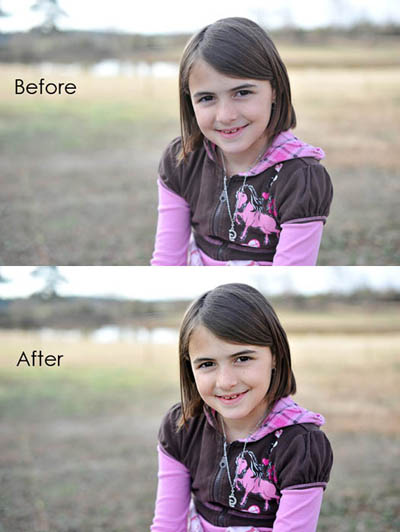
A question I frequently get asked is how to make a simple before and after collage, so that people can show their SOOC (straight out of the camera) image next to their edited version of the same image. It is not a hard thing to do, so I thought a quick tutorial would be the trick.
All these same steps can be used in Photoshop, although you do not have a Project Bin. However, you can use Mini Bridge or tile your images and drag in that way.
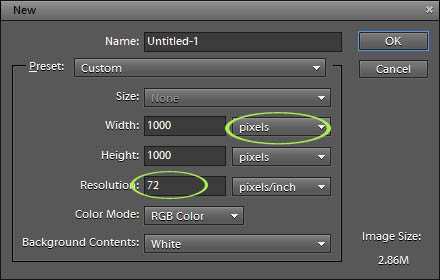
Step 1: Create a new file. Make sure to use pixels as the unit of measure. I make mine nice and wide or tall, to allow room for moving, then I crop down later. If my images are already sized for the web, I make the resolution on this document 72. If they are both still print size (300 dpi), you can leave it as 300.
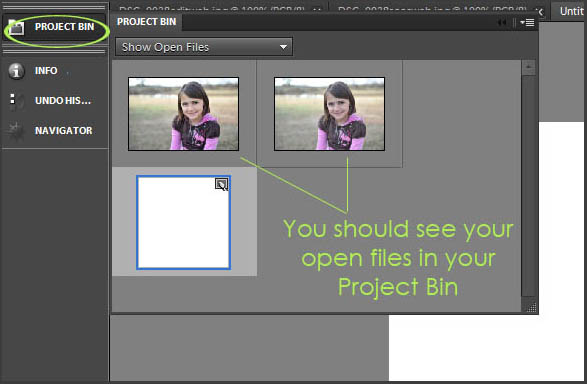
Step 2: Locate your images in the Project Bin (if your before and after are not already open, get them open). The Project Bin is normally at the bottom of the work space but I have moved mine around.
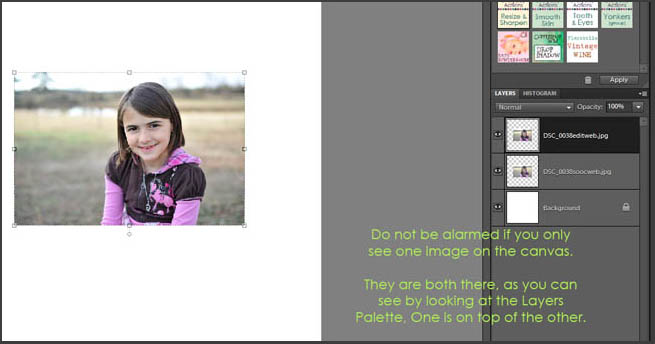
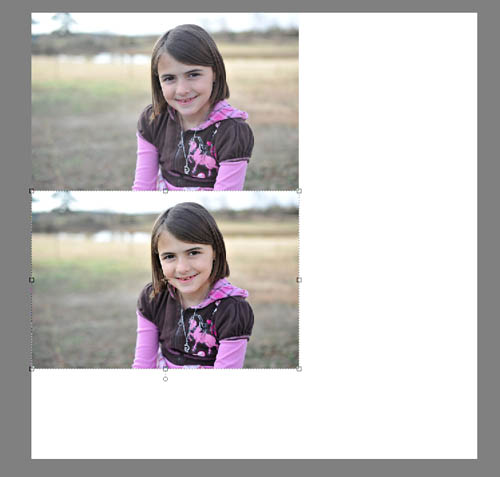
Step 3: Click on each image and literally drag them onto the blank canvas you have open. They will go one on top of the other. Your screen will look something like below:
Step 4: Activate your Move tool (‘v’ on your keyboard) and click on the top image and move it to where you want it. Then click on the second image and move it accordingly. I tend to put mine right up to one corner, to make for easier cropping.
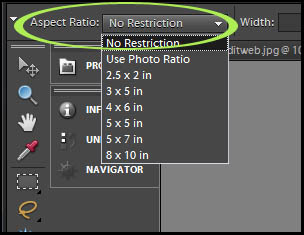
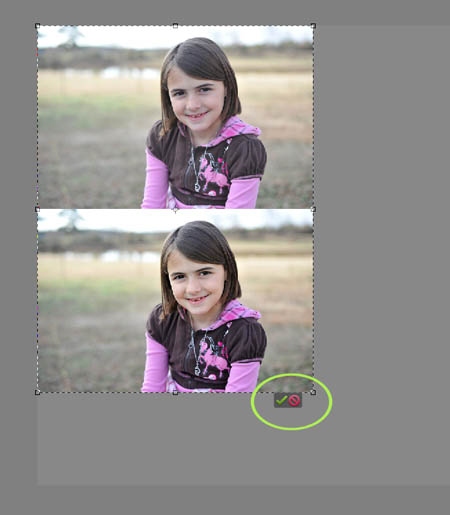
Step 5: Activate your Crop tool (‘c’ on your keyboard) and choose No Restriction in the drop down menu for Aspect Ratio. Crop to just your two images and click the green check mark.
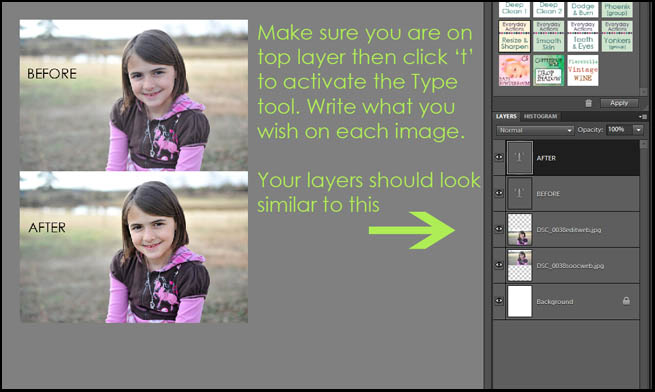
Step 6: To type on the images (like put “before” and “after on them), make sure you are on the top layer, activate your Type tool (‘t’ on your keyboard), choose a font, color and size and type what you want, where you want.
Step 7: Flatten the layers so you have one new background. Easy way to flatten is right click on any layer and choose ‘Flatten’ or go to Layer in the main menu, then down to Flatten.
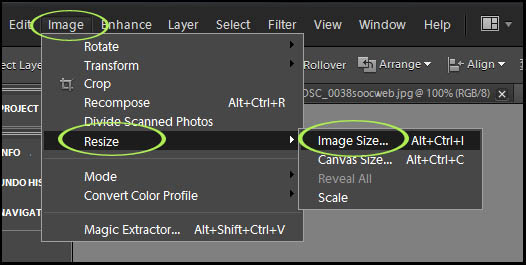
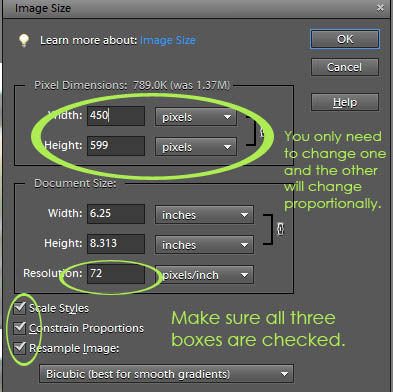
Step 8: Your collage is likely bigger than the space where you are going to show it, so you need to resize it. Go to Image, Resize and then Image Size. Change the pixel dimension of either the width or height of your image. For Facebook, make sure your image is no wider or taller than 720 pixels.
Step 9: Sharpen your image, if you have not already done so, and save as a JPG or PNG.
* I like using High Pass filter method, which is: duplicate layer, Filters (in main menu), Other, High Pass, radius of 1 if 72 dpi used, change blend mode to Soft Light, adjust layer opacity if needed, flatten.
Here is the result:
Below is a quick video showing these steps. If you cannot view the video here, you can view it directly at Screencast, where my videos are stored.


I am trying to do before and after collage but its not working for me b/c my two pics are going on blank page to large what do do???
When I originally commented I clicked the “Notify me when new comments are added” checkbox
and now each time a comment is added I get three emails with the same comment.
Is there any way you can remove me from that service? Thanks a lot!
Thanks to my father who shared with me on the topic of this web site, this blog is
truly awesome.
A motivating discussion is worth comment. I do think that you
should write more about this subject matter, it might not be a taboo subject but usually people do not speak about these topics.
To the next! Many thanks!!
Howdy just wanted to give you a quick heads up.
The text in your content seem to be running off the
screen in Internet explorer. I’m not sure if this is a formatting issue or something to do with browser compatibility
but I figured I’d post to let you know. The layout look great though!
Hope you get the problem fixed soon. Cheers
This piece of writing provides clear idea
in support of the new viewers of blogging, that in fact how
to do blogging.
This is really interesting, You are a very skilled blogger.
I’ve joined your feed and look forward to seeking more of your wonderful post.
Also, I’ve shared your web site in my social networks!