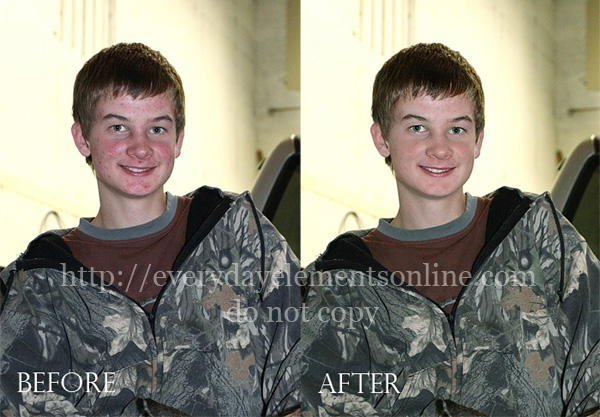
About a month ago a PSE user posted a picture on Everyday Elements’s Facebook page and asked how to fix redness and blemishes on a picture of her teen son. With her permission, I edited the image and posted back to Facebook. Many people inquired how I did it, and after gaining the mom’s permission, I promised a tutorial with video on how I did it.
Well, the month of December has been a crazy one for me, not necessarily because of Christmas, but homeschooling, many doctor and dentist appointments for the kids and other home-life obligations. So, I am finally getting this tutorial out, but it is going to be very video dependent due to time constraints (believe it or not, it takes me much longer to do screen prints and type out the instructions).
On with the tutorial….
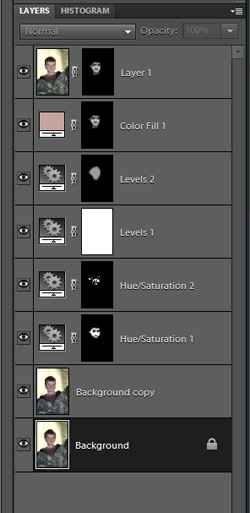
Here is the big secret to editing teens with blemishes – Hue/Saturation and the Spot Healing Brush.
You use Hue/Saturation to pull out the redness from the cheeks and some of the blemishes, then use the Spot Healing Brush to remove the larger blemishes. I follow with a Levels adjustment to brighten and pull down the redness a bit more, then a solid color adjustment to balance the skin color. Finally I do a skin smoothing technique using the Surface Blur filter.
Below is a video with me explaining the edit process. I know that I’m not going terribly slow or explaining everything to the enth degree, but you can pause and replay if needed. The edit is an “intermediate” skill level, but I do explain some basic things too.


Amanda, If I had to say the #1 best tip I learned from your site and tutorials was your use of the color fill to even out skin tones. Add a little smoothing and eye sparkle and photos improve drastically. So — Thank you for your awesome tutorials!
this is a great tutorial. I totally would have gone in with the healing brush first off, so I like that you did it differently. thank you for sharing!
Rachel, unfortunately none of the videos from your blog plays on my computer. I tried it with Chrome, Internet Explorer 8 and Firefox. Only Firefox shows a big Play button but when I press it, nothing happens. Help!
You are the best!! I love how you break things down into manageable information… makes me think I can actually do it! Blessings!
Thank you so very much. This was so great for me to see. I have so much to learn re: restoring or improving many of my scanned old family photos. I have teenage grandsons too with the normal teenage problems with acne. I so appreciate this.
Fabulous tut Amanda
This is great! Thanks for sharing! 🙂
Oh thank you! I have a teenage son and this will come in handy. I’ve used the spot healing brush before on him but all the other layers are new to me. Thanks for doing this.
Thanks Amanda! Interesting using the color fill. I need to try this.