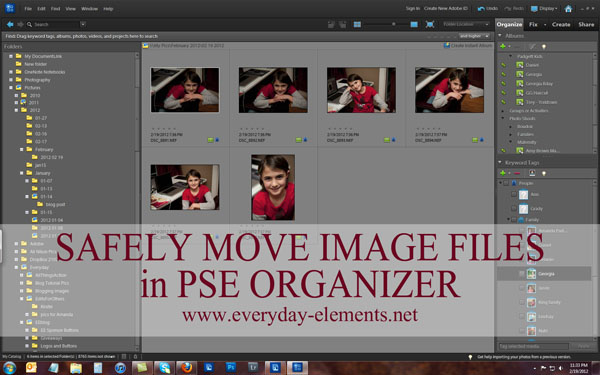
A couple of weeks ago I wrote about organizing images in Organizer with albums, as a way to find them easier and speed working with them while in PSE full edit mode. The response from readers was wonderful, and some great questions were asked in the comments. A few questions were related to moving files (due to their computer hard drive space filling up) and how to still have them tagged and in albums if they are no longer on your computer hard drive.
The answer to that question is to move the files from inside Organizer. That way the program knows where they are and can access the file when you choose to edit it (if you have the external hard drive connected).
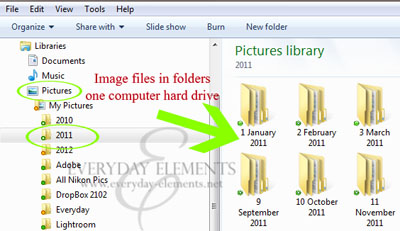
To reiterate – when you upload pictures from your camera or card reader, the pictures are copied onto your desktop/laptop hard drive, to the location YOU specified during import. The pictures are in a folder on your hard drive. Organizer simply shows thumbnails of those images, and gives you quick access to them when you choose to edit.
Imagine that when you imported pictures to your hard drive via Organizer that PSE attached an invisible string to it. When you are browsing pictures in Organizer and then choose to edit one, PSE simply follows the invisible string to access that particular file. If you move the file, or the folder the file is in, via Windows Explorer or Mac Finder, then the invisible string is broken and when you want to edit the image, PSE has no idea where it is.
Okay, so now that we’ve covered where the image files are, let’s talk about how to move them from the hard drive to an external drive in a way that Organizer can keep track of them.
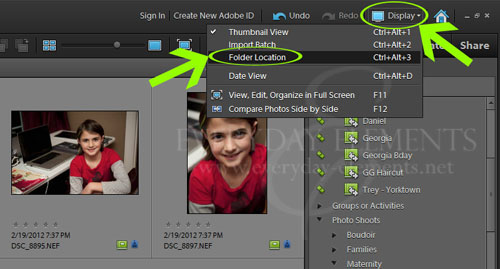
Open your PSE Organizer and look to the top right-hand corner. We need to change our view from Thumbnail View to Folder Location View. You will click where it says “Display” and when the drop down menu appears, choose Folder Location.
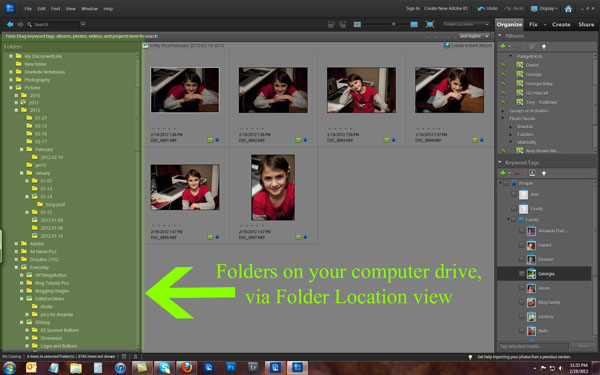
Your computer folders should show up on the left-hand side of your Organizer screen. Navigate to the folder you wish to move.
Note: I have tried to move folders that have many subfolders and my Organizer hung up, so I used a small folder. You can move top-tier folders, but allow your Organizer lots of time to “churn/work.”
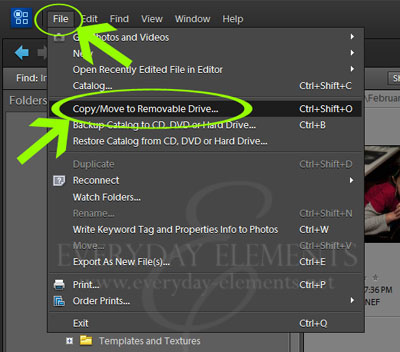
Once you have clicked on the folder you would like to move to the external drive, go up to File, then click on “Copy/Move to Removable Drive…”
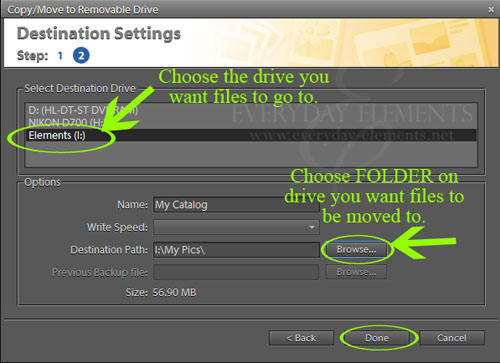
Another dialogue box will appear, and you will click on the drive you wish to move them to. I had three alternate drives available, but the one I wanted to move the folder to was the I drive, which is where my Western Digital 2 terabyte hard drive was connected.
Once you choose the drive, then choose the folder location on that drive. You can make new folders on the drive, so if you want to create a master folder, then monthly folders, you can do that.
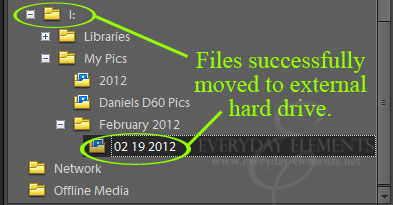
You will see the folder move from your computer hard drive to the external drive in the Folder Location view in Organizer. Below you can see that move folder now resides on the I drive.
These same steps can be applied if you just wish to reorganize your image folders (in case how you imported them was not exactly what you want now).
I feel compelled to let you know that Lightroom does this very same thing (moving files/folders) but in a much more user friendly way. If you are new to photography/editing, keep learning PSE, but if you are serious about file management then Lightroom needs to be moved to the top of your wish list.
Below is a quick video showing these same steps. The video cannot be viewed in email or blog readers; you must click to view the original post to see the video.
Also, the video should play on iPads. It may take the video a few moments to begin after pressing play, so give it time. If you are having trouble with it play at all on your iPad, make sure your iOS is up to date.


Thank you so much for this and answering my questions from your last post!!! Of course after that post I bought LR3 so now I geuss I will wait and use that software for organizing if it really is that much easier.
thanks for this 🙂 And for the creating album tutorial 🙂
Thank you! Very helpful!!!
i have been trying to figure out how to display just a particular folder’s images for months! thank you!! 🙂