Post written by Andrea Thomas of Speechless Photography.
Hello, my name is Andrea and I’m a chronic over shooter.
I used to agonize over culling the 20 or so nearly identical photos I had of each pose from a session. Is this one better or that one? I like dad’s smile in this one, but mom’s eyes are too squinty. Mom’s eyes are open in this one, but baby’s head is turned. Anyway, you get the picture. It was such a waste of my valuable time as I stared at each individual image. I love to edit my photos, but I had to cull them down to a reasonable number or even editing became a chore that I dreaded.
I tried to shoot less, but then if I only took a couple of photos of a pose and didn’t like either of them, I was out of luck. I knew there had to be a better way to handle this.
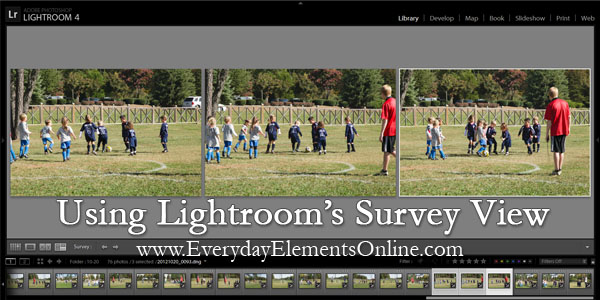
I’m happy to say that if you’re a Lightroom user, the Survey View is the answer! Over shooters, rejoice!
Here is a quick video of how I use the Survey View in Lightroom 4:
Here are some written instructions:
- Start in the Library module of Lightroom
- Click on the Survey View option (looks like a box with 3 smaller boxes in it)
- Change your filter to Unflagged Photos Only (this is optional, you’ll see why I do this in a minute)
- Select the photos that you want to compare. Either select the first one, hold shift and select the last one (if they are all in a row) or hold control and select the individual photos (if they are spread out).
- You will be able to see all of your selected photos at once, sized to fit the space available in your center pane. I like to minimize the side panels and filmstrip to give me as much space as possible. Just click the little white arrows on the edge of each panel to hide them. They will slide back out if you mouse over the area and you can click the arrows again to display them when you are done.
- If you see a photo that you know you will not use and want to delete, either click the little x flag under the photo (bottom left) or select it on the screen and hit the X key on your keyboard. This will mark the photo as Rejected. If you set your filter to Unflagged Photos Only, then any rejected photos will immediately disappear from the the selection and your filmstrip at the bottom of the screen. To see those again, just remove the filter.
- If you see a photo that you want to remove from the compare view, you can either hold control and un-select it in the filmstrip at the bottom of the screen or click the little X in the bottom right-hand corner. This does not mark your photo in any way, it just un-selects it from the group of photos that you are currently comparing.
- Once I have finished comparing all my photos, I go to Photo (menu item at the top of the screen) -> Delete Rejected Photos to actually remove those from my hard drive, my Lightroom catalog or both.
Now I can continue on with my regular workflow knowing that I will only have to take the time to edit the photos that I know are the best of the bunch! I hope this quick Lightroom tip saves you as much time as it has for me!
Note: My video and instructions are for Lightroom 4, but my understanding is that Lightroom 3 also has the Survey View and works in a similar way. Someone please let me know if this is not the case.


Andrea, thanks for the very useful tutorial!! Amanda, thanks again for your great web site!
You’re welcome, Jill!