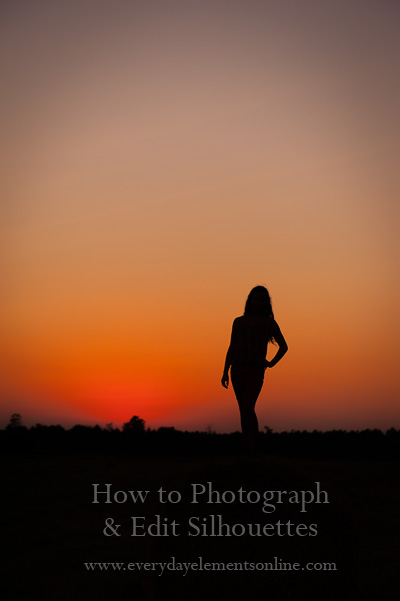
Recently at Everyday Element’s Facebook page we have been having a good time sharing silhouette pictures, so I thought a now would be a good time for a tutorial on how to photograph and edit silhouettes.
Silhouettes are images where the subject or subjects are totally blacked out against background of a sky or setting/rising sun.
There are usually two parts to a silhouettes: capturing it in-camera and perfecting it in post-processing. This post will try to quickly cover both of those aspects of silhouettes.
Photographing the Silhouette
The key to photographing silhouettes is to meter for the brightest spot in the sky, other than the sun. Doing that will make the shutter speed much faster than it was previously, and block out all the light that is on your subject.
What does it mean to “meter?”
It is easiest to answer that question with a hands-on demonstration. Okay, put your camera in MANUAL mode, then look through your view finder (eye piece you look through). Do you see a little line graph with tick marks or number line? That is your meter.

Image from Photo Tuts Plus
When the big tick mark that moves gets to the MIDDLE, the exposure is where you want it (with some caveats).
- If you are in Spot Meter mode – the areas where your focal point is what the camera is exposing for
- If you are in Center Weighted mode – the camera is exposing for the center of the image
- If you are in Matrix mode – the camera is exposing for the center plus the areas near the four corners
To best meter for the sky, put your metering mode into either spot or center-weighted. Once you have that done, here are the steps to create your silhouette:
- Point your camera to the brightest part of the sky (not the sun)
- On a Nikon, with your “pointer” finger, use the top scroll wheel to move your tick mark to the middle, to be under the zero. On a Canon, use your thumb and move the back scroll wheel/circle to move your tick mark until it is under the main tick mark in the middle of the line
- Focus on the subject (can be tricky if the light is getting low) and press the shutter release
Are you completely lost at this point? No worries! Click HERE to download (FREE) the lesson on metering in my Everyday Photography PDF workshop. Hopefully it will connect a few dots and you’ll be on your way to a beautiful silhouette!
Shutter Speed Alternate Technique
If the whole metering-thing is bogging you down, just think Sx3 (read that “S times 3”). Are you thinking “Say what?” What I mean by Sx3 is “super shutter speed.”
When photographing silhouettes, your shutter speed it going to be super fast. The below image illustrates this tip.
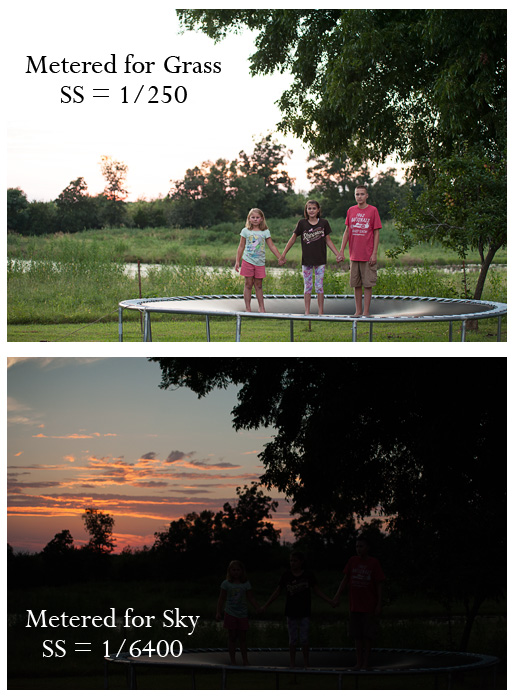
Getting just the right brightness for the sky can be tricky, so watch your shutter speed: make it faster if the sky is too bright (not enough drama) and make it slower if the sky is too dark and you want more light to it.
********************************************************
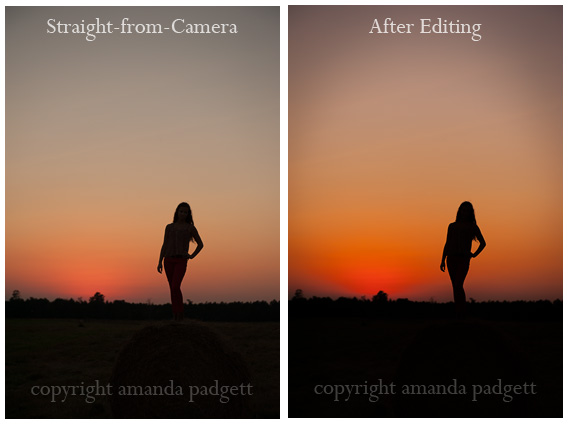
Editing the Silhouette in Photoshop or Photoshop Elements (or Lightroom)
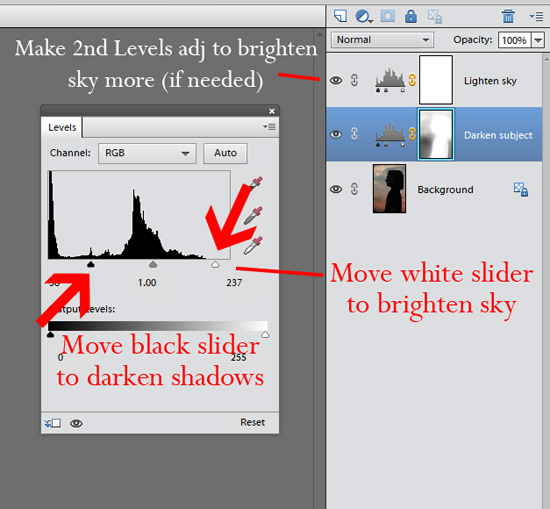
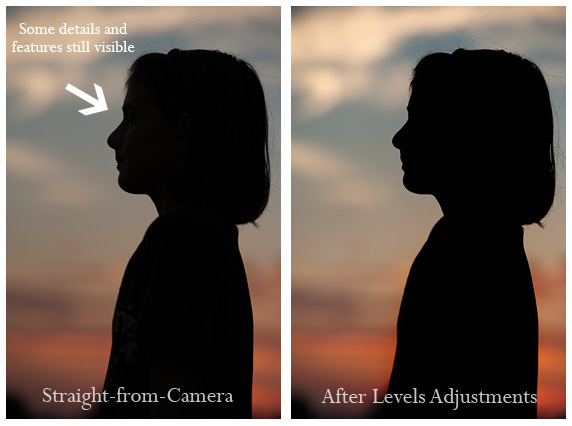
Usually with silhouettes, some part of your subject(s) will still be visible, however slight. You want to darken those areas and it is easy to do with one or two adjustment layers.
- Create a Levels adjustment (click on circle that is half black/half white) and move the black slider to the right a lot
- In that same Levels adjustment, you can move the white slider to the left if you want to brighten the sky some
- To brighten more of the sky, you can do a second Levels adjustment layer, moving the white and gray sliders to the right to suit your image
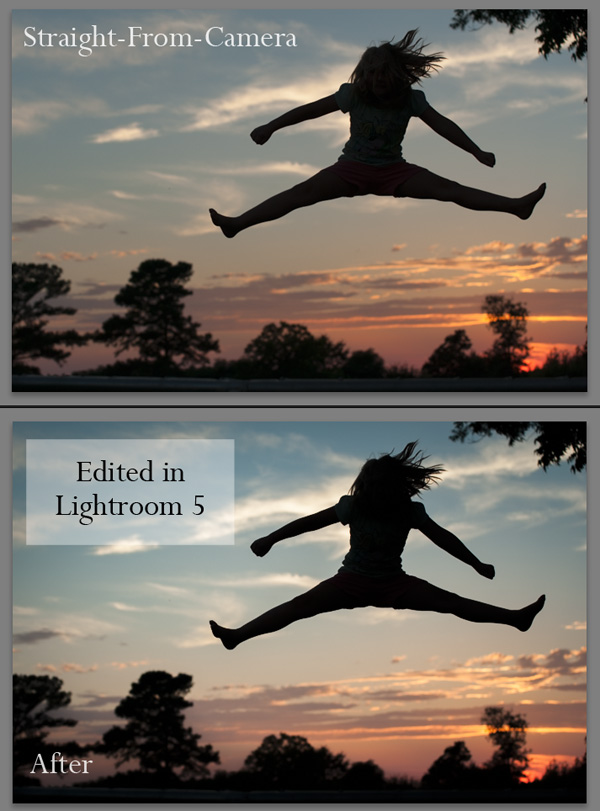
Here is an image from the same “shoot” as the silhouette above, of my niece doing a split in the air. The image was editing in Lightroom 5, doing virtually the same things. I moved the Blacks to the left, increased the Exposure a bit and used a graduated filter to brighten the sky a bit.
If you would like to read more about photographing silhouettes, below are some helpful tutorials I found for you:
- How to Photograph Silhouettes from Digital Photography School
- How to Shoot a Great Silhouette by Kristen Duke Photography
- How I Shoot Silhouettes by The Pioneer Woman
I asked others to share their favorite silhouette shots on Everyday Element’s Facebook page and some amazing images have been shared. If you have some silhouettes, please feel free to post to the page; I would love to see them!


Great tips Amanda!!
This is very helpful! Thank you!
Love it – thanks!
My canon has the wheel on the top not the back.
Thanks so much for sharing these tips – what perfect timing with the gorgeous sunsets happening right now!
How neat! I’ve always wanted to do this!
Another great tutorial! I’ve never really understood metering and this helps so much.
you read my mind, Amanda! my friend took an awesome silhouette of her son fishing & ever since i saw her, i’ve wanted to do some photos with the kids & silhouettes! i may try it tonite, if it doesn’t rain! 😉