The (long overdue) final post in the selection tools series is here!
In previous tutorials, we covered what selection tools do, the lasso tool, the marquee tool and today the topic is making selections with the selection brush, quick selection tool and Magic Wand. They are similar and work together nicely, so I grouped them together in one tutorial.
Due to time constraints (i.e. homeschooling) this post is going to be light on screen prints and written instructions, and instead heavy on video instructions.
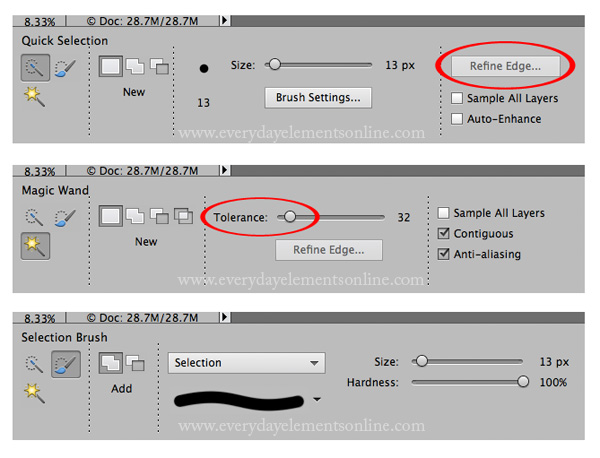
The selection brush, quick selection tool and the Magic Wand are all found under one icon in the tool bar. The icon will show whichever tool you last used.
Once the icon is selected, the tool option menu will show one of the below views. You can change the tool by clicking on the icons on the left.
Which each of the selection tools, you need to choose a feather or “refine edge.” Remember that the feather will be how much the area selected blends in with the pixels around the selection. I explain the options in the video tutorial below.
The Magic Wand is different from the others in that it’s designed to be a quick-click tool. You set the ‘tolerance’ and then click on the area you want selected. The ‘tolerance’ is how different the pixels can be in order to be selected. A low tolerance number means the pixels have to be VERY similar in order to be selected. A high tolerance number means the pixels can be a good bit different and still be selected.
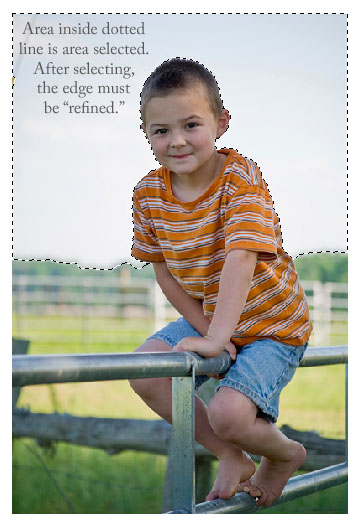
There are times when you do not want much a feather because you want the selection to be very specific, like when selecting the background because you want to replace it.
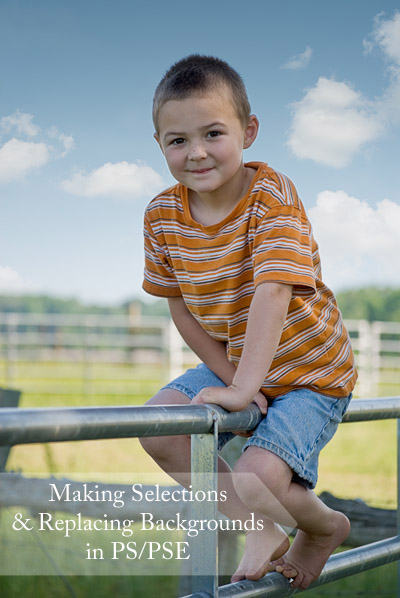
To illustrate these tools and their options, I chose to replace a blow sky in an image with a blue sky that has some clouds. The video tutorial below shows me using each of the tools to make my selection.
Warning – I used a gradient on the mask to blend the sky background. Do not worry if you get completely confused by that; I will have a tutorial on that technique in the next few weeks.
Do you want to give this edit a try? Click HERE to download the image and the new sky picture. Follow the steps in the video tutorial and let me know if you have any questions.


What if this child was on a swing and the chains (from the swing) was dividing the sky into 3 parts. How do you highlight three different areas with the selection tools. I am only able to select one…