This post was moved over from Photography Haven.
Those new to digital photography may be asking “Defog? What the heck is defogging?” Well, many digital images come out of the camera with a bit of a haze on them. Sometimes that is from incorrect exposure settings, sometimes because of the sun hitting your sensor and other times just because.
Many actions created include a “defogging” layer, which is usually a duplicate layer with an Unsharp Mask filter run on it. I do it a bit differently and thought I’d share it with you: I defog my pictures by simply using a Levels adjustment layer and tweaking the sliders. I am not saying one way is better than the other, but this way will lead to a smaller file size because you are not duplicating the image.
Step 1: Open up your image in Photoshop or Photoshop Elements. Here is my before picture:
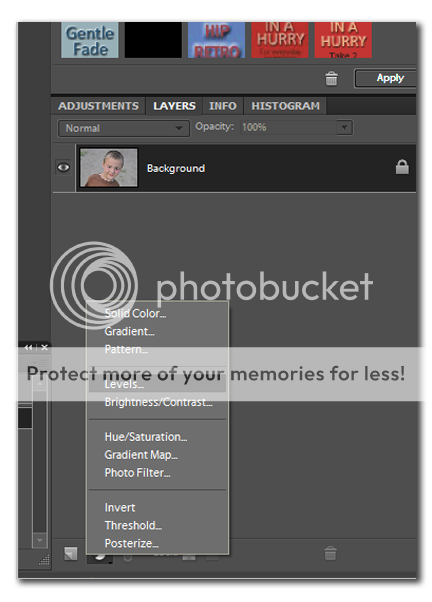
Step 2: Create a Levels adjustment layer by clicking on the half black, half white circle in your Layers palette. A drop down (or up 😉 ) menu will appear; click on Levels.
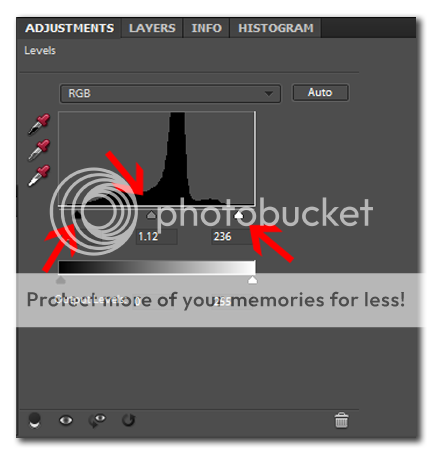
Step 3: The Levels adjustment box will either pop out onto your screen or fold out below/above your Layers palette. It will look like this:
Step 4: Now for the “defogging,” which I usually just call a “Levels Bump” in the actions I’ve created. Move black slider to meet the histogram “mountain.” Then do the same with the white slider. Then, if your image is a portrait and the person’s face needs a little brightening, slide the middle slider, the gray one, to the left a little.
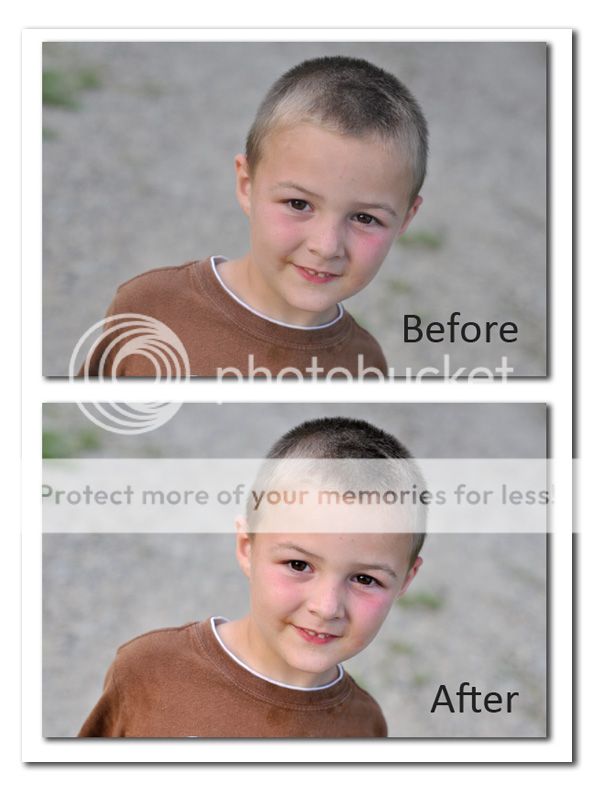
Step 5: Your image will have more definition and be a little brighter as well. Here is what my image looks like after only moving my sliders to meet the sides of the “mountain” and moving the midtone slider to the left some.
Here is a side-by-side comparison:
See what a difference just one little step can do? I hope this little tip helps you along in your own editing journey.
Here is the image from above cleaned up and with a cooling action I created. Looking at it now, I think he’s a little bright. I edited it late last night and my eyes must have been seeing things. 😉 I’ll fix it soon.







Speak Your Mind