Today I am sharing a tutorial on how to create a dodge and burn layer. It is a simple and easy layer to create, but very handy for lightening and darkening small or large areas with just one layer.
In addition to the tutorial, I am giving away the Dodge & Burn action I made this past weekend, which does the exact steps I list. If you would like to download it, go HERE. I encourage you to go through the steps a few times, so that you will know how to create this layer, and then to speed your flow, use the action when needed.
I use this layer almost every time I edit to darken lips a bit, darken the rims of eyes (like a touch of eyeliner) and brighten catchlights. You only need one layer, all you do is change from a block brush to a white brush.
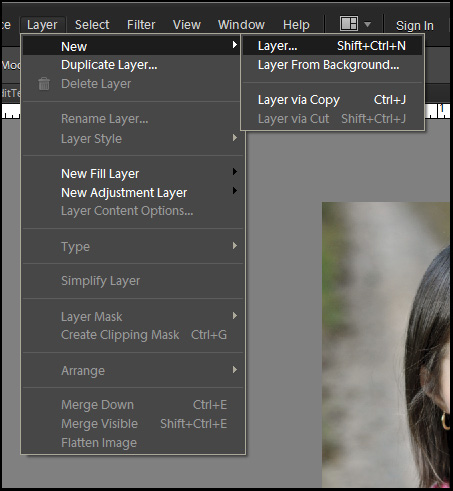
Step 1: While you have an image open in Full Edit workspace, go to Layer, New and then New Layer.
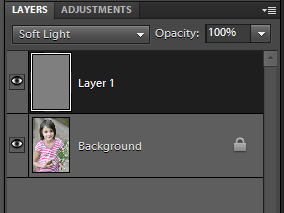
Step 2: When the New Layer dialogue box pops up, change the blend mode (where you see ‘mode’ in image below) to Soft Light and check the box below it that says “fill with soft light neutral color.”
This is what the layer will look like in your Layers palette:
Step 3: Wherever you brush with a black brush will darken and wherever you brush with a white brush will be lightened. This effect can be strong, so I encourage you to start out with a low opacity brush and work from there. I usually use a brush between 30-40% opacity and then still lower the layer opacity down a good bit.
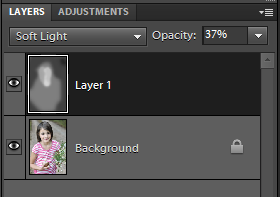
Below you can see that I burned the outside edges of this image with a black brush (where you see the dark gray) and lightened the shadowed side of my daughter’s face with a white brush (where you see faint white).
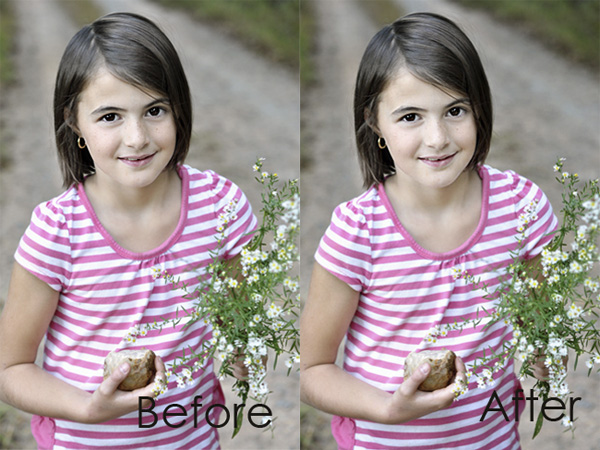
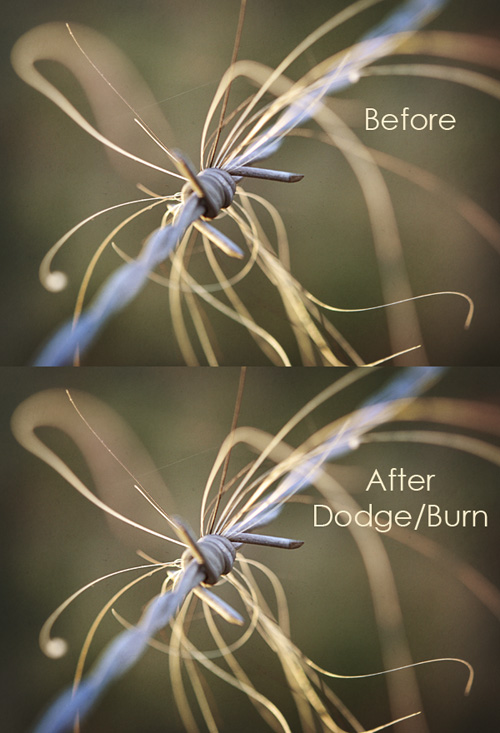
Here is the before and after comparison. Please note that I used a low opacity brush and brought the layer opacity down to 37%. The image had already been given a clean edit, so it didn’t need too much tweaking.
Below is another image I used the dodge and burn layer one. I darkened the edges of the image and lightened the middle.



Your pictures are always beautiful!!!
Wow – I am amazed by your pictures and techniques. Someday I hope to learn a smidgen of what you know!
xox
Jen
Thanks so much Amanda! you’re awesome!
Thank you SO much for this tutorial! I shot my brother’s family this past weekend and their favorite had too much shadow~ this was just what I needed!!! 🙂 I followed the tutorial but the action did not pop up on my list… how do you get them to show in the list?
Who knew that could be so painless….u just saved me untold hours…thankyou thankyou!
Thank you SO MUCH for this! It couldn’t have come at a more perfect time as the Christmas card pictures of my son needed some lightening. I have learned so much from you! I appreciate everything and love your site. You are the best. THANK YOU!
my photography mentors, retired pro-photographers believe in getting the photo in the field, aka no need for Photoshop ~ have giggled at times thinking I’m to be channeling Ansel Adams as he never had Photoshop either!! ~ Am soooo thankful to have found your wonderful website, tutorials & generous freebees …as have fully embraced PSE!!! Best wishes to all ~ Happy snapping, A.
This is great! Every time I go through another tutorial step by step I learn a little more..and its like a world opened up with this one!! LOL.
Thank you so much for your tutorials!!! Thanks to you, I am finally getting somewhere with my PSE10 photo edits!
i wasn’t able to download the burn/dodge layer.
thank you so much for this tutorial. i wish i understood more, b/c i love the effects that it gives, but don’t understand things like when you said using the dark brush and the light brush.
i will keep trying so in the meantime thanks for the tutorials.
April,
The dark and light brushes refer to the bottom left corner there are two boxes of color (black and white) which ever color is “on top”–or the one showing the whole square and cutting off some of the one behind it…is the one you are “painting” with). The white brush will lighten (dodge) and the black brush will darken (burn).
Yay! Thank you Amanda!
I’ve been using this method for a couple of years now and love the technique. However, I have always used Overlay blend mode. I’ll give the Soft light mode a try! Thanks for the action!
Really useful post. I am very happy to read this site. Thanks for writing informative articles.
Aw, this was a really quality post. In theory Id like to write like this also – taking time and real effort to make a good article but what can I say I procrastinate alot and never seem to get anything done Regards
It only goes to show where theres will theres a way. Keep on trying. – I have bad reflexes. I was once run over by a car being pushed by two guys. – Woody Allen Born 1935
I just want to say thank you for this tutorial!!