I have had many requests for a tutorial on how to use the liquify tool in Photoshop Elements. I must admit that I do not use that tool very much but for certain images it can be beneficial.
Say you took pictures of someone who is not that happy with their weight and they ask if you can slim them up some in Photoshop, well the tool you would use is the Liquify tool. Make sure to NOT use it on a picture of someone without them asking as that could cause great offense.
The tutorial today is very basic and just how I have used the tool myself. If you Google “liquify tool Photoshop Elements” you will find many video tutorials, especially on You Tube so you can see how else to use this wonderfully handy tool. Just know that the majority of those videos are using Photoshop and not Photoshop Elements, and there are some options in the PS Liquify box that are not available in PSE.
Step 1: Open your image in the Full Edit Mode in Photoshop Elements and make a duplicate layer (control+j or command+j on a Mac). I am using a picture of yours truly. I am carrying some extra weight and am not opposed at all to being “Photoshopped” some to look a little lighter. 🙂
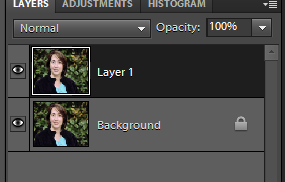
Step 2: Go to the main menu bar and click on Filters, then Distort and Liquify.
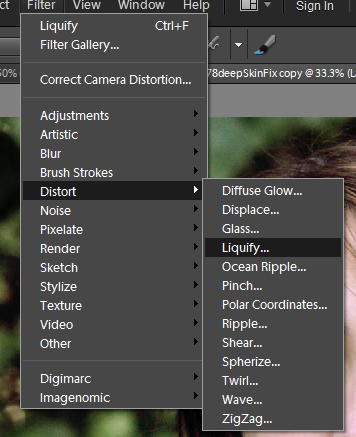
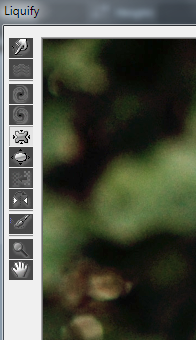
Below is the Liquify image box that pops up.

Step 3: On the left side is the liquify options you can choose from. I like to use the Pucker tool (the box that is white in the image below).
Step 4: On the right side is the brush options. The bigger your brush, the more area of the image you are going to affect. The brush pressure is how strong the effect will be. I used 66, strong but not too strong.
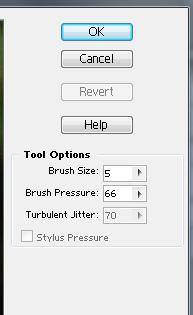
Step 5: Click where you would like your slimming-down to start and slowing move downward. For some images/body parts, it may be best just to click and pull gently in each spot and not drag, just try both ways and see what works best for your image.
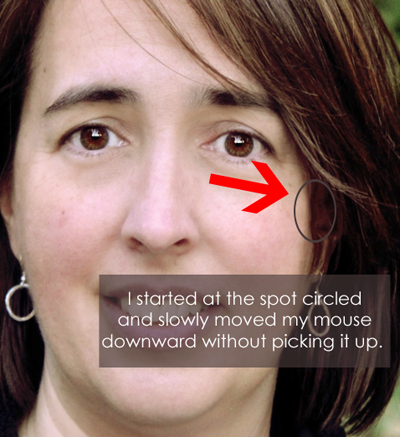
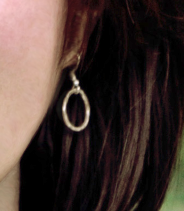
After working on both sides of the face, my earrings ended up a bit distorted. I managed to get one earring fixed but not the other. I quit messing with it and decided I could fix it another way.
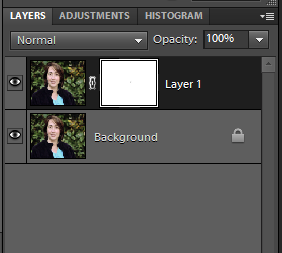
Step 6: If you have some distortion like I did, add a mask and see if you can cover it up with the original image in that spot. If you have Photoshop Elements 8 or older, use a layer mask action. If you have PSE 9, just click on the mask icon in the bottom of the Layers Palette.
Step 7: Activate your brush tool (b on your keyboard) and make sure it is a black brush and that the mode is normal and opacity is at 100%
Step 8: Brush only over the earring. This will cover the distorted earring change and let us see the original below it.
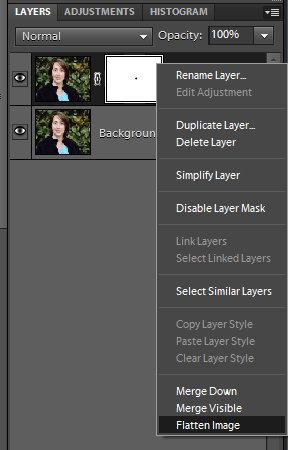
Step 9: Right click on a layer in the Layers Palette and choose Flatten.
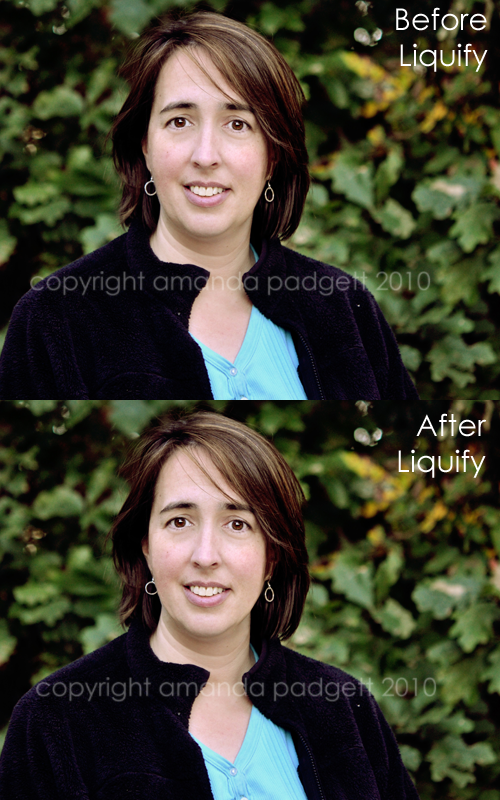
Here is a before/after of my liquify change:
I see two spots I would like to have fixed better, but I decided not to obsess over it. Too much else to do this time of year.
This technique was hard to capture in screen prints, so I also made a video (below) and hopefully everyone can view it. To make is larger and easier to view, click the monitor icon in the bottom right-hand corner. If for some reason your computer will not play it, you can also see it by clicking HERE.





Ok Amanda, I didn’t even know this was possible! Now if you could just show me how to shrink my nose I’d be on cloud nine! lol No really, thanks for this wonderful tutorial….I’m wondering what you will pull out of your bag of tricks next??? 🙂
Thank you, Debra! I am glad to be able to teach you something new; you know your way around PSE so well already.
This is a FABULOUS tip Amanda!!! I can’t wait to try it!!…..this could be dangerous {another excuse NOT to diet! lol}
I know! LOL I am going to use in on a picture of my dh and see what he thinks. LOL He has more of a double chin than me. 😉
Ooooooooo. I. Am. In. LOVE. Can’t wait to play around with this.
Thank you, Rachel! It is a fun tool and some people create amazing artwork with it too.
Hi!!
I just found your website from the CoffeeShop Blog! and it is really awesome! I have been trying to install actions into my Photoshop Elements 6.0 on a MAC for about a month, and still can’t get it right. Do you have a tutorial on how to do that? Thanks!
Rachel the trick to installing on a Mac is making sure you have the right Library. Macs actually have two. Look to the far right of your computer and you’ll see the library you should be in. After that, follow the path written out on most instructions. Also, make sure that you delete your Mediadatabase.db3 file and then restart PSE.
Here are my instructions: http://www.mediafire.com/?817ns2n0db97si5
If you are still having trouble, I can help trouble shoot more, just let me know.
This is cool! I remember learning about this before, but I keep forgetting about it… what’s the point in having a cool expensive pse if I don’t ever use any of the fun tools??? 🙂 Thanks for the reminder!
I think I heard angles singing. I LOVE PSE now. Liposuction with the click of a mouse without any down time. Oh, happy day!! 🙂
Thank you this tutorial was awesome!!
What’s up, its good article concerning media print, we all be aware of media is a enormous source of information.
Hi Amanda. You are fantastic. I just had a photo shoot and forgot my belt. Wrapping a black piece of fabric around my waist seemed like a good idea until I looked at the pictures. By using this technique, It looks like a belt again. Thanks so much!
Annie,
Your story tickled me. So glad this tutorial helped save the photo! It’s an old post; I need to do a current one and your comment has given me the nudge I needed.
I look forward to it! I signed up for your newsletter so it’ll show up right in my inbox! 🙂
Thanks for the good writeup. It actually was once a entertainment account it.
Look complicated to far added agreeable from you!
However, how can we keep up a correspondence?
I’m amazed, I must say. Rarely do I encounter a
blog that’s equally educative and entertaining, and let me tell you, you’ve hit the nail on the head.
The issue is an issue that too few folks are speaking intelligently about.
I’m very happy I found this in my hunt for something concerning
this.