Ever wonder how the beautiful textures you see in the photography world are made? Some are pictures of actual textures like rust on a building, or wood from a barn, linen from a dress, etc. Others are just a compilation of brushes and colors, blend modes and more. My post today addresses the later approach.
So, last week I gave you a set of five texture brushes, right? This tutorial shows you how to start putting them to use, outlining the basic steps I have taken in making most of my textures. When I make textures, I usually use brushes from Brusheezy and ShadowHouse Creations, however the texture brushes I gave you were made from my own textures (the name of the brush is from the name of the texture used to make the brush).
Diclaimer: this tutorial comes only because I want to share what I have learned, not because I have mastered making textures. My textures often end up looking pretty similar to each other. 🙂 You can purchase gorgeous, professional textures from these talented vendors: Florabella, Kim Klassen and Paint the Moon. Some beautiful, free textures can be found at Shadowhouse Creations and The Coffeeshop Blog.
Okay, on to making textures….
Step 1: Create a new file with a white background. I prefer to use the dimensions 15 inches x 11 inches and 300 dpi.
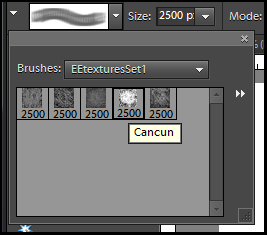
Step 2: Load your texture brushes (mine are used for this example, but the same process works for other texture brushed you find).
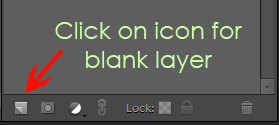
Step 3: Create a blank layer in your Layers palette.
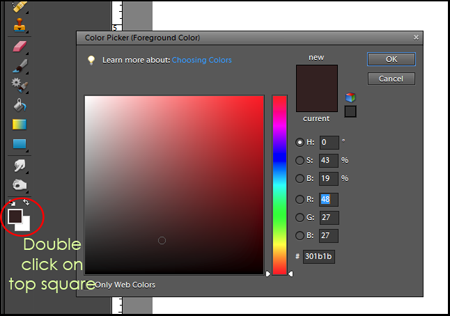
Step 4: Click on the top square of your color palette. The color picker box will come up; choose a color you would like to use for your texture.
Step 5: With your texture brush active, stamp it down on the blank layer.
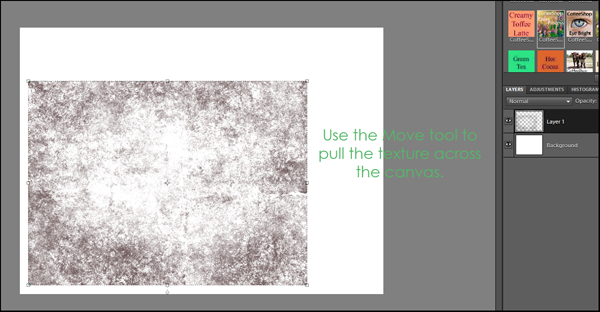
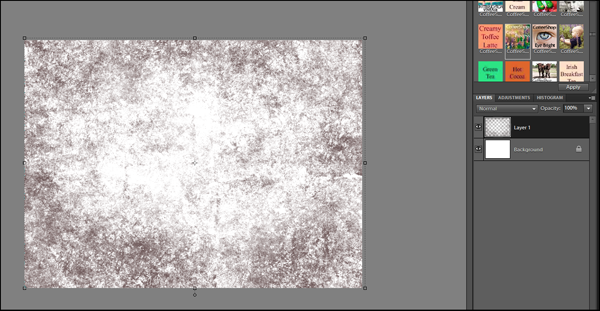
Step 6: Use your Move tool (v on your keyboard) to stretch the brush to cover the whole canvas. Click the green check mark to commit. Below is what it will look like once you’re done.
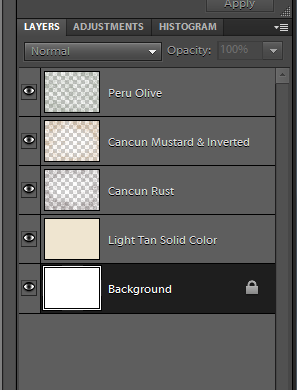
Step 7: If you want to use other colors or wish to use additional texture brushes, create separate layers for each one. I also added a blank layer and filled it with a neutral color. Below is what my palette looked like before flattening.
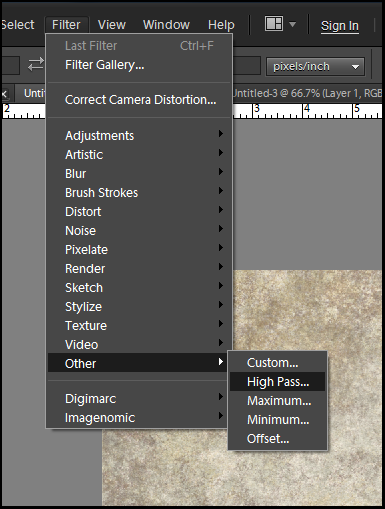
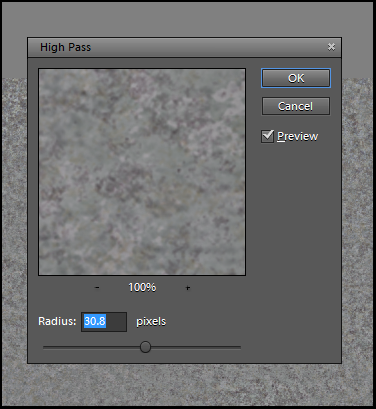
Step 8: Flatten and create a duplicate layer (control + j). Make a High Pass layer by going to Filter, Other, High Pass
Step 9: Set the radius to a very high amount. We want to add some depth and grit to the texture and the High Pass will help provide this.
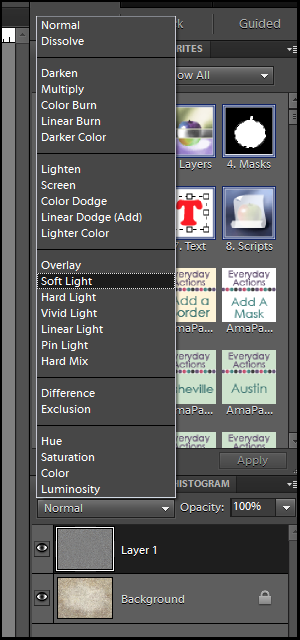
Step 11: Change the blend mode to Overlay or Soft Light.
Step 12: Reduce the opacity to suit and flatten. Save the file as a JPG file, quality of 10.
Special Note: If you would like to watch a video tutorial of me going through these steps click HERE. I used a different texture brush and different colors, so the result is very different, but the steps are the same.
Here are two textures I created with the brushes, using the exact steps I just laid out. If you would like to download them for your own use, click on the image of the textures.
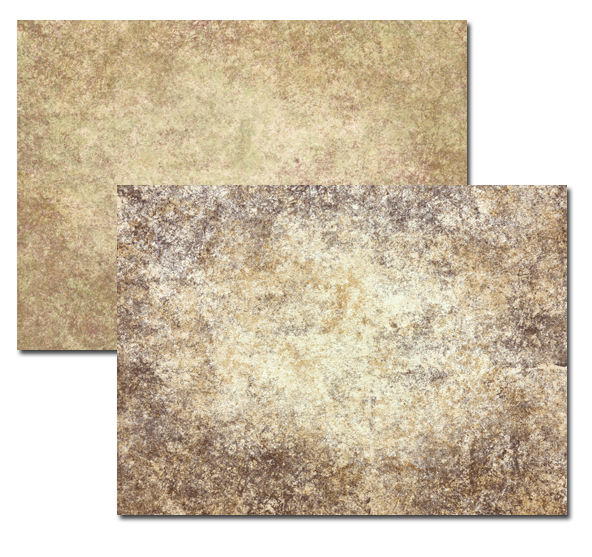 My textures always end up some form of rust, dirt and gritty textures. I have yet to work out linen or fabric textures or oil/paint stroke textures both of which I am very much in love with. Textures are a fun past time for me, but not something I will devote much time to perfecting. I leave that up to those who have made textures a specialty. The vendors I mentioned above had put a lot of time in making their textures and I love to support their shops.


When the student is ready, the teacher will arrive… I just received Photoshop Elements and the Bamboo Craft Tablet for Christmas (haven’t installed anything yet) and so glad I saw your tweet tonight. I’ve often ignored many tweets dealing with Photoshop since I didn’t own it and now that I do, I’m on the lookout for tips and saw yours. Can’t wait to learn more!
Thank you for this tutorial… I have always wondered how to make a texture–especially with the brushes.
And thank you for the tutorial on installing the brushes–I left a question about it on flickr and your instructions were very clear and understanding!
Thank you Amanda. I like yours better than mine but I am pleased I was able to follow along and create one. Your instructions were perfect!
I have ordered PHE 9 but it hasn’t arrived yet stumbled on your site via Bower Power (love that blog too) so I can’t wait to try and use it with all your helpful information Thanks for sharing!!!!
Amanda as usual you always amaze me with your generosity!!! Your willingness to share all of your knowledge and help each us improve is so appreciated!!! Thanks again!!!!!
Oh Thank you Amanda!! I am so excited to try this! You know I loves me some textures. 🙂
Amanda – YOU ROCK!! I was just talking w/ Rita (Coffeeshop Rita) about wanting to learn how to make my own textures and here you are, making yet another awesomely timed post! 🙂 (although, I’m still holding my breath on the ISO post… hint, hint, — haha! just kidding!)
I’m going to grab a bit of time this weekend while the hubby’s at work to try my hand at this! I can’t wait!! 🙂
🙂 I made one this morning!! I added it to your flickr group if you want to take a look! Thanks again for sharing your expertise with us!!
Here’s a link to my blog post, too, if anyone’s interested:
http://snapshotsbymichelle.blogspot.com/2011/01/another-summery-shot.html
Michelle,
Thank you so much for the link in your blog!
Thank you all so much for your kind words, I truly hope you enjoy this action.
Thank you Amanda!! For me you are my mentor 🙂 I can’t wait to try this today.
Heyaa i’m for the first time here. I came across this
board and I to find It really useul & it helped me out a lot.
I am hoping to give something again and help othrs such
as you helped me.