Sharpening your pictures is an important step, whether for print or for web. It is also a pretty simple thing to do, but confusing for those just getting started. So, I am going to tackle this in a series, much like my clipping masks series, starting basic and progressively getting more complicated.
For this first tutorial in the series, I am teaching about the simplest sharpening technique, in my opinion, and my favorite – the high pass filter.
Steps to sharpen for print are:
- Completely edit your image…I mean be THROUGH with editing including cropping; sharpening is the last step you take
- Flatten your layers and make a duplicate layer (control/command + j)
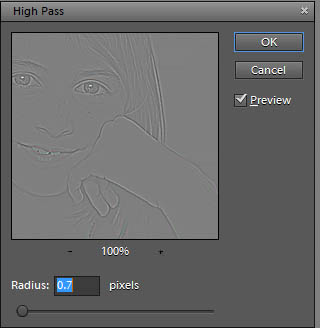
- Go to Filters, Other, High Pass
- When the radius box comes up, move the slider until you start to see white around the edges of face/skin (almost like a halo) and then back it back down until it is almost gone. Hit okay.
- Change the layer blend mode to Soft Light (some use Overlay, but I like Soft Light)
- View your image at no smaller than 50% zoom, turn off the high pass layer, then back on to see the sharpening effect. If hair and eye lashes seem to be glistening, lower the layer opacity.
- Use a layer mask to cover up areas where the sharpening is too much, if needed.
- Flatten and save.
Steps to sharpen for web are:
- Use your Undo History (located under Window in menu) and go back to your crop
- Go to Image, Resize, Image Size and change resolution to 72 and the width or height to be whatever you need (no more than 720 pixels high/wide for Facebook)
- Duplicate the layer and follow the same steps as above except the radius will be much smaller.
Below is a video tutorial walking you through these steps.


Thank you Amanda!
~ingrid
Great post! Thanks for this! I had been using a sharpening action I bought at Paint the Moon, but I always like to know how to do it without actions!
THanks for this. Sharpening has boggled my mind too.
I think you showed me this, and this is what I use for ALL of my blog pics and they have been looked nice and sharp!! – I set the resolution to 72, and my pics no wider than 500px for my blog, then I set the radius to 1.0 and seems to work perfect on all my pictures!!
Great stuff. I’ve been using Photoshop for years, but for graphics. Now that I’m trying to make my web photos look better, I feel like a beginner again.
I’ll be following along, thanks.
Maybe I need more than a digital point & shoot.
Wow, thanks! I’ve had no idea how to sharpen except to increase “clarity” in my RAW editor. I’m quite new at this — I saw how when you enlarged the image for the web it was pixelated. How do you treat images for the web that will show up one size on a blog but can be clicked on to enlarge? Blogspot lets you publish images within the blog, but they are enlarged to full screen when clicked on. I’m curious if I resize the image for the web as you did if it would appear poorly when enlarged within the website.
I was wondering what you should you do if you have an action that has sharpening in it? At what point in the edit should you use the action, and if it has sharpening in it, should you use the high pass method at the very end still?
Thank you, thank you!!! The first clear explanation to so many image questions I had!!!! You are amazing!!!!
I see the concern.I am very e happy to hear that you got your Supra fixed; I remember reading about some of your problems !.
Hey ,
I am trying to do the high pass filter in PSE12 but the problem I am facing is that it is applying directly on the image and not showing any box to set the radius. Can you explain what I am doing wrong ?Thanks
I’ve been exploring for a little for any high quality articles
or blog posts in this kind of house . Exploring in Yahoo I ultimately stumbled upon this website.
Reading this information So i am glad to show that
I’ve an incredibly just right uncanny feeling I found out exactly what I needed.
I so much for sure will make certain to don?t omit this
web site and provides it a glance regularly.
Hi Amanda,
I tried to watch my first tutorial with you. Topic, sharping. I am new to
Elements, so all your tutorials would benefit me. The problem is, I can’t understand your voice. I’m using a 27 iMac and you just sound very high pitched and squeaky. No lower register tones. Do you know of a way to adjust the sound coming out of my computer. Looks like I could really learn from you.
Dale