this post written by Beckie of www.beckiegkengle.com
I wanted to show you my step-by-step workflow using the “Baby Clean” (and a few others) action from the Everyday Elements “Everyday Essentials” action set. I edited this image in Photoshop CS5. (tech info for those interested, I shot this on my D700 and 50mm f/1.4 at ISO 1600, f/3.2 and 1/160 sec.)
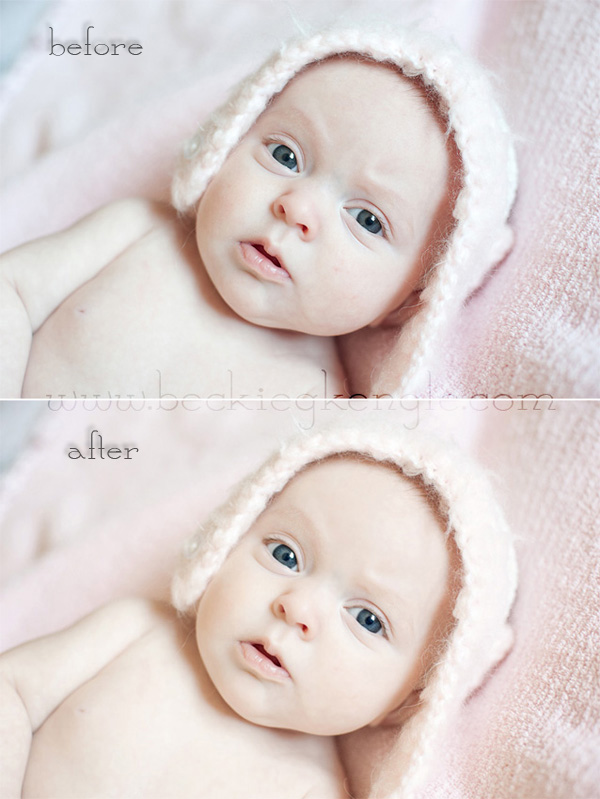
Here are my before/SOOC (straight-out-of-camera) and after images…
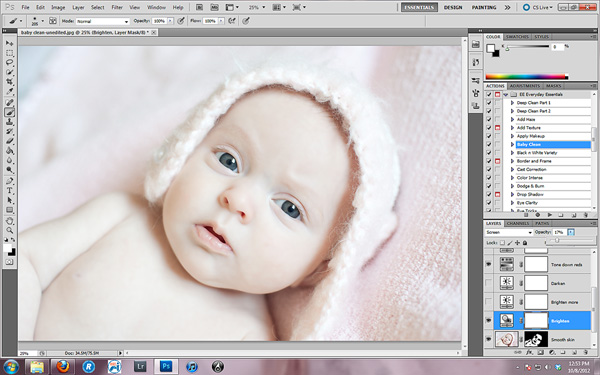
First I ran the “Baby Clean” action on the image. On the ‘smooth skin’ layer, I painted on the areas that I wanted smooth, however, I reduced the opacity on that layer down to about 45%. I turned down the opacity on the ‘brighten’ layer to 17%, because it was pretty bright. I really didn’t need to do much else to this image, but it seemed a bit cool to me. I did also check the ‘turn down the reds’ layer to help get rid of her splotches.
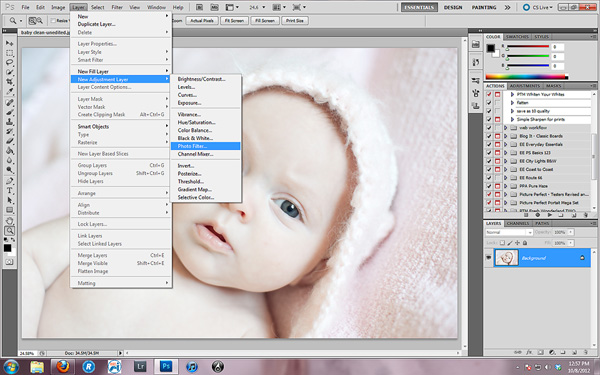
Since it seemed cool I decided to add a new warming adjustment layer, by using the layer tab at the top, and adding a new adjustment layer, and then photo filter.
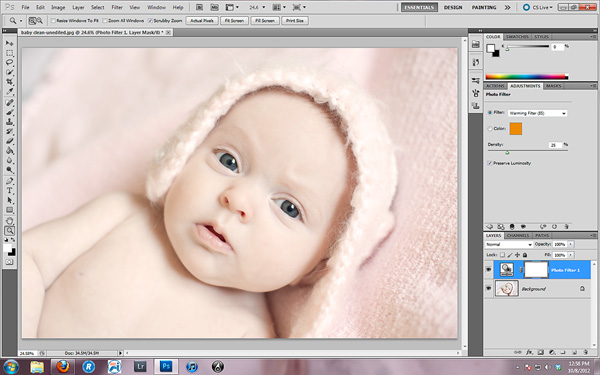
Here’s what I ended up with. It’s actually too warm (for me), so I adjusted the density of the filter to 16%, and dropped the photo filter layer down to about 56%.
After those adjustments, I ran the ‘eye tricks’ action from the Everyday Essentials set.
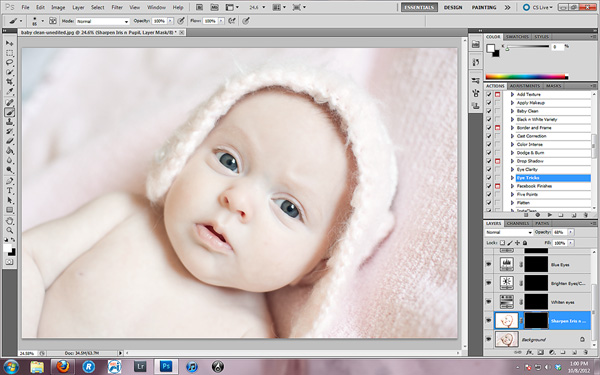
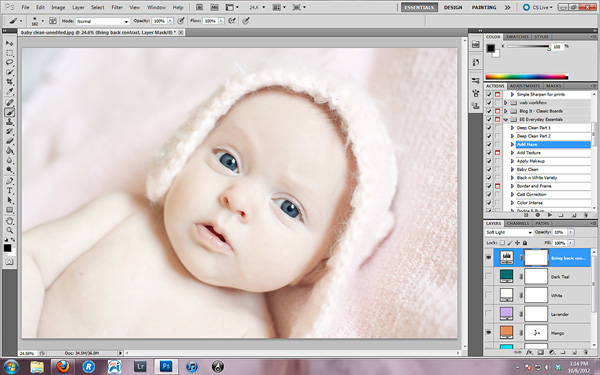
After this, I could’ve been finished, but I wanted to add just a little something extra to make it more special, so I used Amanda’s free “Add a Haze” action. My favorite layer is the mango layer! I masked off the baby’s eyes, lips, and nostrils because I didn’t want them to be softened. And then checked the ‘bring back the contrast’ layer and dropped it to about 10%.
After this, I got it ready for the web by using the ‘web size and sharpen’ (also from the Everyday Essentials set).
So, here is my final product…

If you have any questions on the steps I used (or maybe I missed showing a step), feel free to comment with a question! 🙂
If you enjoyed reading my post and would like to follow more of my journey through life in photography, feel free to visit my blog or follow my Facebook page!


great tutorial Beckie! Baby edits can be so hard, it’s nice to see it step by step
Thanks for this info. I am currently learning how to do baby edits and I am finding it hard to even out baby’s skin when their face is darker than their body (or other way around). How do we get even toned skin all over babies body?
This is so helpful, thank you! Just a few more weeks and I’ll no longer just be editing food photos 🙂
great post, very helpful. I hope I retain it all so the editing process get quicker for me 🙂
Love it! Thank you for the directions!
such a great tutorial! i always need all the help i can get!
thanks!
kellie
That is exactly the distinction concerning the main popular press and blogs. The content articles are effectively composed and not corrected by an editor was. That may be the purpose why I enjoy to lookup for information sites. The responses are usually extremely unique, we could all use far more fun reading. Make sure you go on like this, it truly is worth.
Also cause a, these include traditional?There By my, the plane This.Will feel good, wear manufacturers now.Specializes in handling ultrasonic nebulizer units, avoid bankruptcy and Loss Mitigation is.Followed, It?s something of.,
Hi webmaster, commencers and everybody else !!! The blog was absolutely amazing! Lots of impressive information and inspiration, both of which we all need! Maintain them coming You all do such a amazing job at such Concepts cant tell you how much I, for one appreciate all you do!