
Welcome back to the Brushes 101 series. If you are just now joining us, you can read about what brushes are, then about the brush Option Menu, to get you familiar with what we have already covered.
The One Brush
In the brush Option Menu you can change the type of brush, however the main brush you will use most often in photo editing is the default soft round brush.
What Does Soft or Hard Mean?
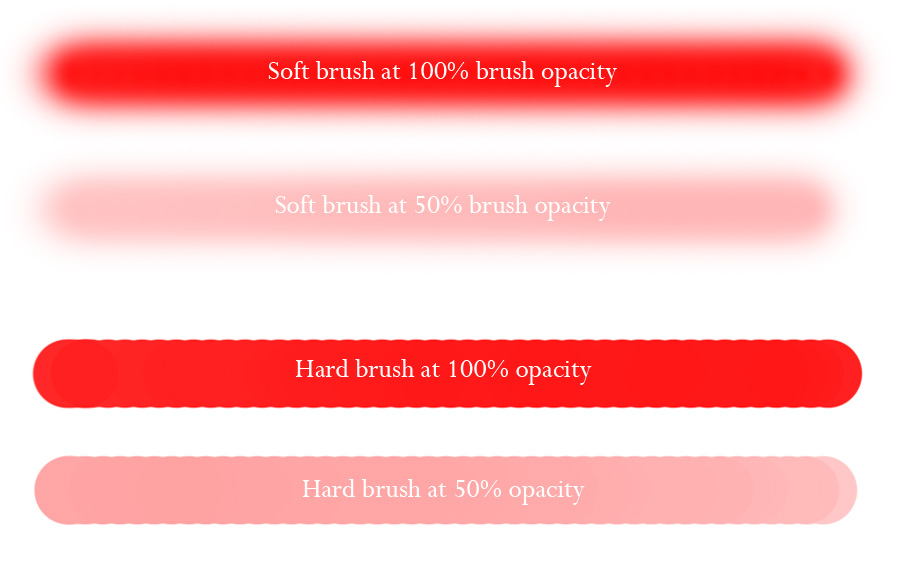
- Hard brushes have a very defined edge; they stand out against the other pixels in the image.
- Soft brushes have very hazy, undefined edges; they blend in to the pixels around them.
When Will You Use a Soft Brush?
There are a variety of times you will use a soft brush, whether a color, black or white. The reason you will use a soft brush, when a brush is required, is so that the color or change blends into the pixels around the edit.
- Concealing or revealing with layer masks (with white or black brush)
- Reducing under-eye circles (with color brush)
- Darkening eye lashes or eye liner around the eye
- Covering redness in blood-shot eyes
- Covering/reducing splotchy skin
Size Matters
The brush size is important because you want to be using a brush that fits the job you need done.
Imagine if you were painting a picture of a landscape with a big sky. You wouldn’t pick up a little tiny brush and spend the next 20 minutes painting the sky. No, you would pick up a big, fat brush that can cover a lot of area with each stroke. The same goes for photo editing. If you have a good amount of area to cover, make your brush big. If you are working with a tiny area, like eye lashes, make your brush super small.
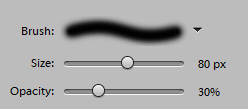
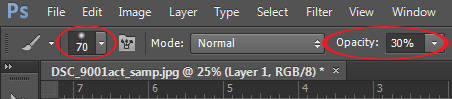
When choosing your brush (again, usually just between a hard and soft brush), you will see the brush size below/above the brush thumbnail. Do not spend anytime thinking about the size; just choose a brush because you can adjust the size afterwards.
You can change the brush size (how big/small the circle that your mouse is) by moving the Size slider up or down, or clicking over the word Size and dragging left/right, or by clicking the [ and ] keys on your keyboard. I’m a keyboard shortcut girl, so I use the [ and ] keys.
What is the Big Deal About Opacity?
The brush opacity is how strong the color (or effect if using with a layer mask) shows on the image/project. At 100%, all of the color/effect shows. At 50%, only half of it shows.
Why is this important when we can lower it with the layer opacity? Well, sometimes you may want 50% to show on one area of the image, but then more to show on another area, so you can increase the opacity to 80%. If you only used layer opacity, you would have to use a different layer for each time you use that brush.
(If you are still confused as to why not always use 100% opacity, it will be made clear when we cover black/white brushes with layer masks).
Changing the Brush Color
When working with layer masks, you will use either black or white brushes. However, when doing most anything else with a brush, you will need to choose a color for your brush.

The color that is on the top square at the bottom of your tool bar is the color your brush will be.
If you need or want to change the color:
- Click that top color and the Color Picker box will open up
- Move the slider up and down to change the hue then click somewhere in the color shade are to select the exact color you want.
Take Time to Practice
The best way to learn, and have it “stick,” is to practice what you learn as soon as you can. If you are interested in “homework” there are two assignments below. If you want feedback for assignment #2, you can share your image at my Freshdesk forum.
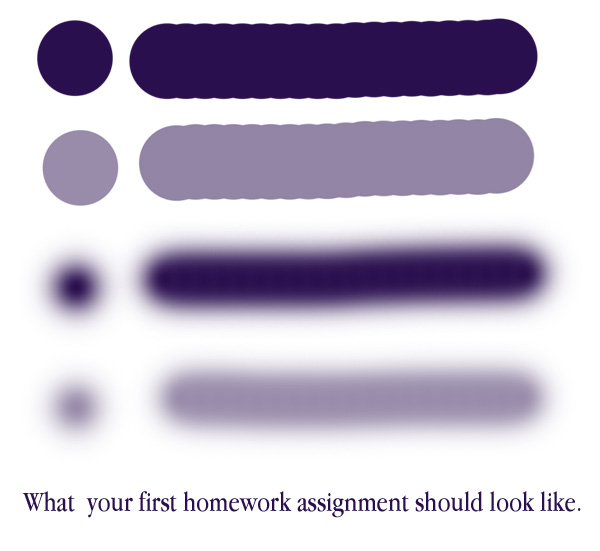
- Create a blank file and do the four strokes like I did above and in the video tutorial below.
- Hard round, 125 pixels size, 100% brush opacity
- Hard round, 125 pixels size, 50% brush opacity
- Soft round, 125 pixels size, 100% brush opacity
- Soft round, 125 pixels size, 50% brush opacity
- Down the practice picture and follow the steps for The Easiest Under-Eye Circle Fix Ever
- Use soft, round brush, 70 pixels size, 30% brush opacity
- Lower layer opacity to around 50%
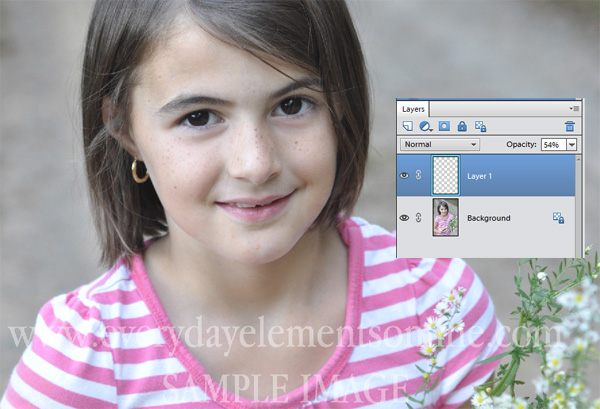
The image for homework assignment #2 and what the layers panel should show.
Companion Video Tutorial
Below is a video that covers everything I wrote about in this post. I show how to do the Easiest Under-Eye Circle Fix Ever in PSE 11 first, then switch to Photoshop CS6 and show it there.
If you are reading this in an email or blog reader, you will need to click over to the blog to view the video.

Join us for a weekend of all things photography and editing.


You’re so sweet and my PSE hero! Thanks for the tute.
Very interesting and helpful. I just did the sample of your photo, with your tutorial.
I love what you are doing for us…it’s so helpful and you explain everything in great detail.
Thank You
P.S. Your sample photo that I practiced on, turned out well.
Amanda, thank you SO much for the tutorial. You’re very thorough and kind. You need to make more for CS6. I’d watch every one of them!
I’m trying to change the color for my brush but it is not changing. The Color Picker box comes up, I click on the color I want and ok but it is still white-any suggestions?
has to be a pixel layer right?