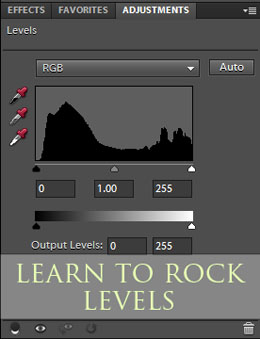
One of the most powerful, useful and probably overlooked tools in Photoshop and Photoshop Elements is Levels. It isn’t a “tool” exactly, rather an adjustment that can be used as an adjustment layer or as an adjustment on a duplicate layer.
The slightly more powerful brother to Levels is Curves, which is only available as an adjustment layer in Photoshop, not PSE (although Curves can be run on a duplicate layer in PSE, see my post on that topic).
Many people jump to the conclusion that Curves is vastly superior to Levels, and often feel the need to upgrade from PSE to CSwhatever before bothering to learn Levels and rock the program they already had in their hands. I find Levels every bit as useful to Curves, and it is the foundation for all of my edits.
So, what all can Levels do for you?
- Adjust exposure and contrast
- Change White Balance
- Alter color tones
- Fix color casts
- Identify clipping
- Fix sun haze
I am going to briefly show how to use Levels for the uses I just listed out. There is also a video tutorial at the bottom showing most them, and I will link to other tutorials I have written that expound on the various uses.
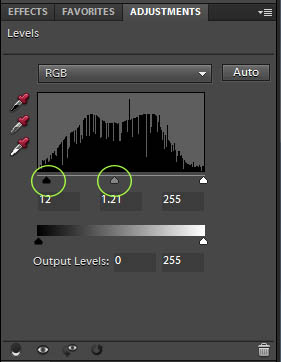
1. Adjust exposure and contrast on an image by moving the black and white sliders in to meet the base of each side of the histogram “mountain.” This is the general rule, not one to be followed 100% of the time. There are times when the sliders should not be pulled in all the way; use your eyes and best judgment. For this picture I moved each slider (circled in image) in to meet the side of the “mountain” or in the case of the white slider, I moved it in just a bit even though it was already hitting the side.
You can lighten or darken the midtones in the image by moving the gray slider to the right or left to suit the image.
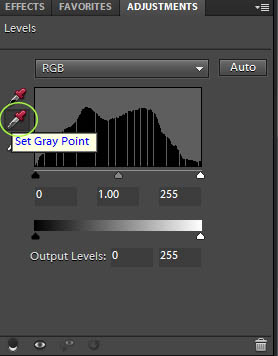
2. White Balance adjustments can be made by clicking on the gray dropper and then clicking on something in the image that is gray. Look for things like jewelry, buttons, belt buckles, you name it. No gray? Use the whites of the eyes. Click around until you find a WB that looks best. If you get near to correct but it looks too much (like too green, too blue, etc.) just adjust the layer opacity down.
I clicked in the white’s of my niece’s eyes until I found a WB that worked for me. It substantially pulled down the blue in the image, making her less cool and making her brown hair and brown shirt much more brown and less red.
3. Selectively brighten areas with midtone adjustment and inverted mask. Move the middle, gray slider to the left, pull in the blacks a bit so you don’t have a washed out image, then press ‘control’ and ‘i’ (‘command’ and ‘i’ on a Mac) to invert the mask. Take a soft, white brush and brush over areas you want to brighten.
Adjust the layer opacity to suit. You will be able to see where you brushed on the mask.
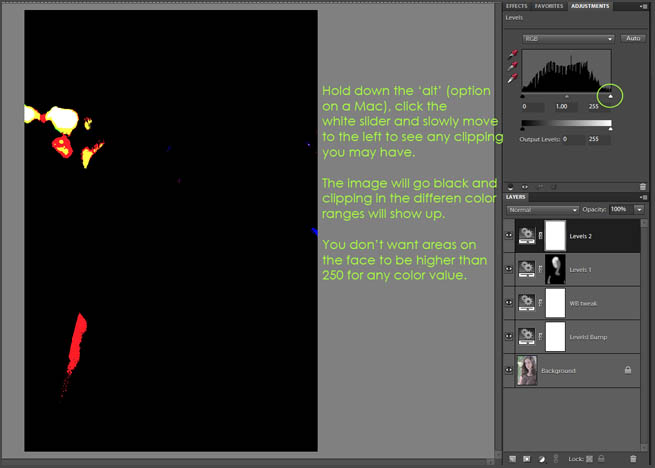
4. Check for clipping, or “blown” areas in your image. Sometimes you will already know areas that are blown, like windows, doors, etc., but sometimes there are areas of the skin that are brighter in color values that you realize. Open a Levels adjustment, hold down your ‘alt’ key (‘option’ on a Mac) and click on the white slider. Sometimes you will see clipping right away, if not, slowly pull the slider to the right.
What should you be looking for? You don’t want areas on the skin to be higher than 250 or they won’t print well. If you have areas that are clipped, open the image in ACR if you shot raw and pull the exposure down and increase the recovery, then reopen in PSE and begin to edit again. If you shot JPG you can fix it, but I don’t want to get into that in this tutorial, just too much in this already. 😉
Want to hear something funny? To get this screen print below I had to hold down the ‘alt’ key with my left hand, use the mouse and click on the white slider and then pressed the ‘screen print’ key with my nose. Oh the things I do for this blog….
Anyway, in the screen print below you can see that there is an area on her arm that has red clipping.
5. Access color channels to change warmth/coolness of image plus do other color changes. This image was still too cool, so I did a Levels adjustment, then clicked on the RGB drop down box and chose the Blue channel.
I clicked on the gray slider and slowly pulled it toward the right, which pulled blue down in the image, increasing the yellow some and warming up the image.
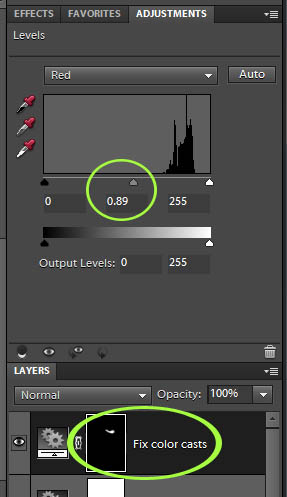
6. Correct color casts. Use lasso tool and fix color casts (accessing color channels again). This creates an inverted mask, so you can use a brush and brush on other areas of the image that have similar casts.
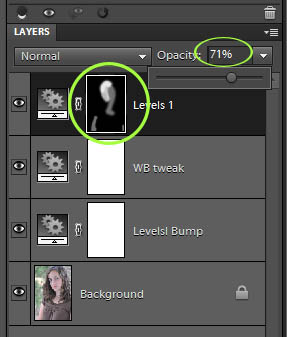
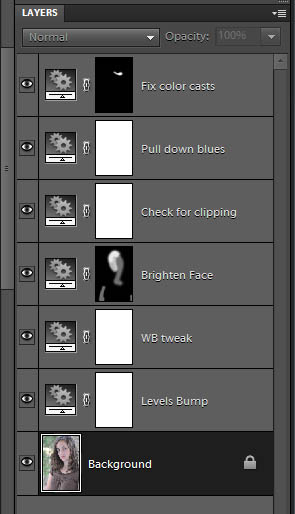
To recap, below is a print showing the adjustments I made, all of them being Levels. Now, the show clipping one is really a dead or empty layer because nothing was changed, I just left it there to illustrate things you can do with it.
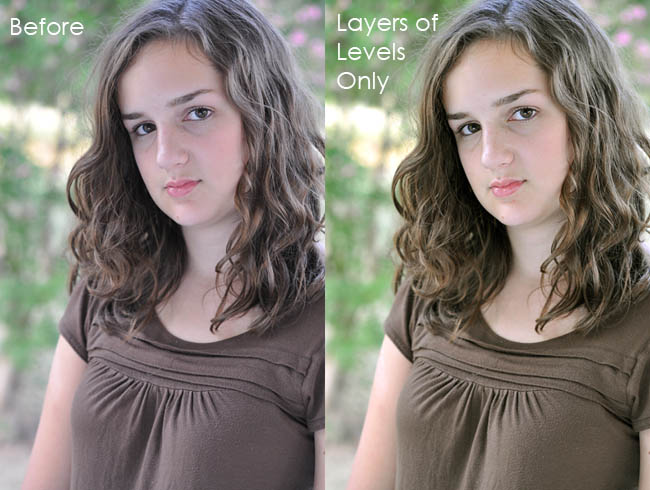
Here is a before and after of the image used for the tutorial. The ONLY changes made were the ones I listed out. More can be done with this image, but I wanted to show what you can do with Levels, what a difference just a few adjustments can make.
If this tutorial was helpful to you, I’d love to hear from you. Just leave a comment; you would be surprised how they feed a blogger’s soul. Have questions about Levels? Leave your question in a comment and I will answer you back in a reply comment here at the blog so others can learn too.
I do try to get to all questions, but if one is left months after this post went live, I may miss it. In that case, use the contact form and send me your question.
The video below was made Thursday while my blog was down due to technical difficulties. Later when I went to make the screen prints, I decided to use a different picture than the one of my wonderful husband that was used in the video. 😉







Thanks for sharing!