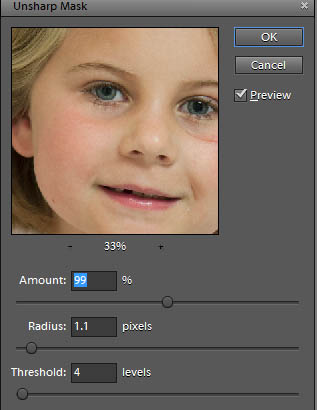
Recently I did a quick tutorial showing you my favorite way to sharpen, the High Pass filter technique, but promised to bring you another post showing you an alternate way to sharpen. This time I am going to talk about the Unsharp Mask filter technique.
Steps to take when sharpening with Unsharp Mask:
- Finish ALL your editing and have saved your image uncropped
- Crop your image to the size you want, then make a duplicate layer (control/command + j)
- Go to Enhance, Unsharp Mask
- When dialog box comes up you have three sliders to change:
- Amount: this is the amount of sharpening you want applied (what is really happening is that dark pixels are darkened, light pixels lightened)
- Radius: this is a buffer of sorts, it is how far out you want the sharpening to go from each area of definition. A low radius means it will only sharpen pixels right next to the areas, large radius means it larger area will be sharpened.
- Threshold: this is how different a pixel needs to be from surrounding pixels before sharpening is applied. Make the threshold too low and everything is sharpened, not always a good idea.
- Adjust the layer opacity to suit and then flatten and save the image.
Some good Unsharp Mask “recipes” via Scott Kelby:
- Portrait sharpening: amount – 75%, radius – 2 px, threshold – 3 levels
- Still life and/or landscape sharpening: amount – 120%, radius – 1 px, threshold – 3
Note: I did this tutorial on an image with some simple ACR tweaks, and it was not fully edited. I did the steps to sharpen, but did not save.


Such great info girl… I had no idea how to do it in Lightroom!
Good job — making it simple!