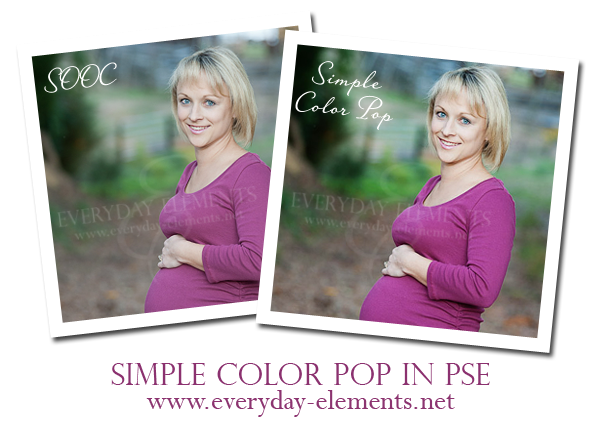
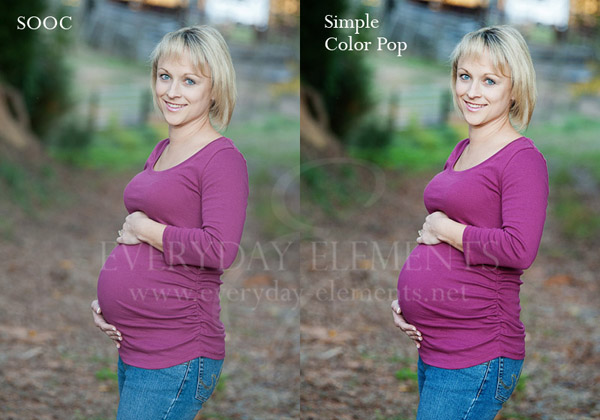
One request I see so often on message boards is how to get a good “color pop.” Many people enjoy bold, rich colors in their photos and often feel the only to get them with with actions. While actions can certainly make it easier to create the effect, the steps to make it happen are actually very simple.
Now, let me add this disclaimer – there is always two or three ways to do the SAME thing in Photoshop or Photoshop Elements. This is only ONE way to get a color pop and there are certainly other techniques, but I am not going to complicate this post with showing them for fear they add confusion instead of help.
One more disclaimer…..Photoshop CS# users – this tutorial is 100% applicable to you too! Every little step is exactly the same. I promise.
For this simple color pop we are going to start with my favorite adjustment layer….do you remember what that is?
LEVELS
(I am sure those who’ve been following this blog for any length of time guessed it, but if you are new to EE, then that may be the first you’ve heard me mention it).
Step 1: Create a Levels adjustment layer (by clicking on the half white/half black circle at BOTTOM of Layers palette/panel).
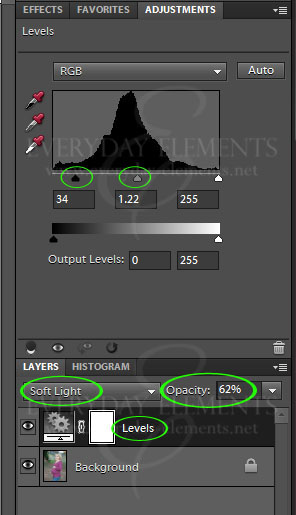
Step 2: Once the Levels adjustment dialog box opens up, click on the BLACK slider that is right under the “histogram mountain” and move it to the right a good bit. Then click on the GRAY slider and move it to the left a good bit.
This step will produce a fair color pop on its own, as it is darkening the dark areas of the image and brightening the mid-tone areas as well.
Step 3: Click on the box that says “Normal” right below the word LAYERS in the Layers palette. A long menu will open up – these are your BLEND MODES.
Change the blend mode to SOFT LIGHT.
Step 4: Reduce the layer opacity to suit your image. If the effect is too strong on some areas, use a BLACK BRUSH and brush over those areas to conceal the effect.
Below is a video showing me go through this technique, step-by-step, in PSE 10. If you have a previous version, do not be alarmed, you can do all these steps in your PSE too! Same goes for the Photoshop users out there!
If you are reading this in a blog reader or via email, you will not see the video below; you must click over to the actual post to view it. This is not my doing, rather the coding/video cannot make it through the hoops required.


Thanks for the tut! While I use levels a lot, it never occurred to me to change the blending mode of the levels layer to tweak the effect!
thank you so much. While I have had this explained to me before. You just made it click. Thanks!
Thanks, Great job. I actually understood this! My picture looks tons better now too.
I use levels all the time. I did not think about changing the blend mode. Thank you for this tip.
As always – a great tutorial, with written instructions!
I never thought to adjust the blending mode either…but I am doing it with my next blog post….thank you!!
Fabulous tutorial… found it very helpful!
just found your blog.. LOVE IT!
this video tutorial was just what I had been looking for..
THANK YOU!
I always use levels adjustment, but I’ve never changed the blending mode of it before. Great tutorial!! Thanks.
Have I told you lately that you are AWESOME? thanks for the tutorials. you explain things in a manner that is very easy to understand!
Amanda, this is one of those things that I knew, then forgot I knew! Like the others, I have been using the levels as a means to adjust light only. This particular thing has been driving me crazy on one particular photograph. Increasing Hue/Saturation just didn’t do what I wanted. Thanks for this timely tutorial! 🙂
Great Tutorial. Thanks! 🙂
Thanks for your clearly articulated tutorial!
I love your video’s you explain everything so well that even i can understand them hahahah. Thank you so much!!!!
Thanks that was an awesome tutorial. I love these simple but effective tips and this was something I was wanting to do. Thank you, thank you, thank you
Thank you so very much. This was just great. Wish I had read this a few days ago when I was trying to get a picture of my little granddaughter to appear better. I’m going to go back to that picture and try this with it.