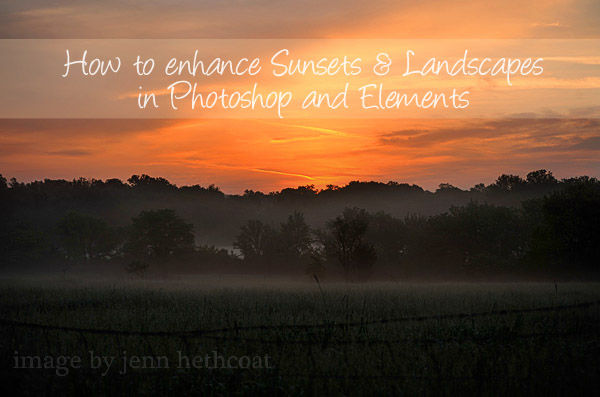
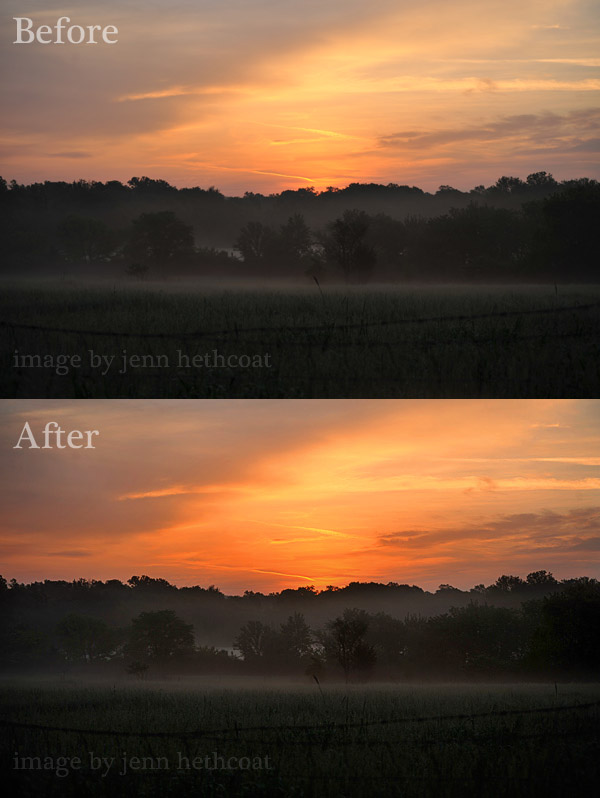
A few weeks ago my friend Jenn from SuperJenn, emailed me and asked if I could give her some suggestions on how to edit a landscape shot she had captured. After seeing the image, I knew right away what I would do – emphasize the dreamy mist and beautiful sunset.
Jenn loved the edit and asked what exactly I did. I figured some readers at EE may enjoy seeing a landscape edit (for a change), so I asked her if I could share the edit here at EE and she graciously gave her permission for me to use it. Thank you, Jenn!!
Each step in this tutorial can be accomplished in both Photoshop and Photoshop Elements.
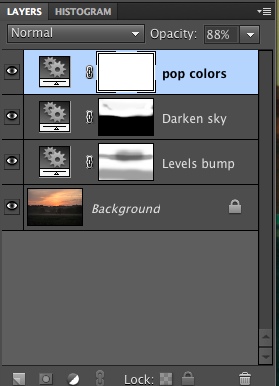
I used three layers to achieve the edit, shown below, then flattened and used Make Dreamy action to give the foreground and mist a dreamy quality.
The first two layers were Levels adjustments. In the first Levels, I pulled in the black and white sliders to around 15 and 245, then moved the gray slider to around 1.10. I used a soft, black brush and concealed some of the change over the foreground and middle areas of the image. Why did I conceal it there? Because that layer darkened the shadows in the image a good bit and I didn’t want to loose the detail in the grass in the foreground or the trees in the middle.
The second layer was another Levels adjustment where I moved the black and gray sliders to the right a good bit, like around 15 and .90. This really deepened the shadows and colors in the picture. However, I only wanted the change in the sunset, so I inverted the the mask (control/command + i) and used a soft, white brush and brushed over the sunset to reveal the enhanced colors.
Am I speaking Greek to you with all the masks, brushes, reveal, conceal talk? Read my Understanding Layer Masks tutorial and it may clear things up for you.
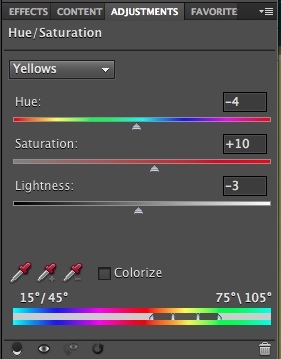
The third adjustment was a Hue/Saturation layer, where I tweaked the yellow and red channels to give the sunset a bit richer colors. I moved the hue slider of each, then increased the saturation and decreased the lightness of both colors. I did NOT need to use the mask because the only yellow and red in the image was in the sunset.
After doing those adjustments, I flattened and ran Make Dreamy, a free action that adds a blur filter, creating a dreamy effect. I inverted the mask that comes with the action and only brushed over the mist areas and a tiny bit on the foreground.
Some tips for editing landscapes:
- Keep it realistic. Fight the urge to make it so beautiful that people with think it’s fake.
- Pay attention to the dark areas and keep from losing detail.
- Think about what you want the focus of the image to be and use adjustments & masks to help that area stand out more.



This comment isn’t directly related to this post – but wanted to comment that I appreciate your showing the images so that I can see them in Google Reader. I couldn’t before, and just noticed that that feature is now enabled. Thanks!
Thanks for the great tips! Very helpful, as always! 🙂
Nice! 🙂
As always, so helpful!! Thank you!
Appreciate your tutorial! Thank you!!
great article-thanks so much!
So, I know all these pieces – just would not have thought of the application. Your tips are always helpful! Thanks, Amanda.