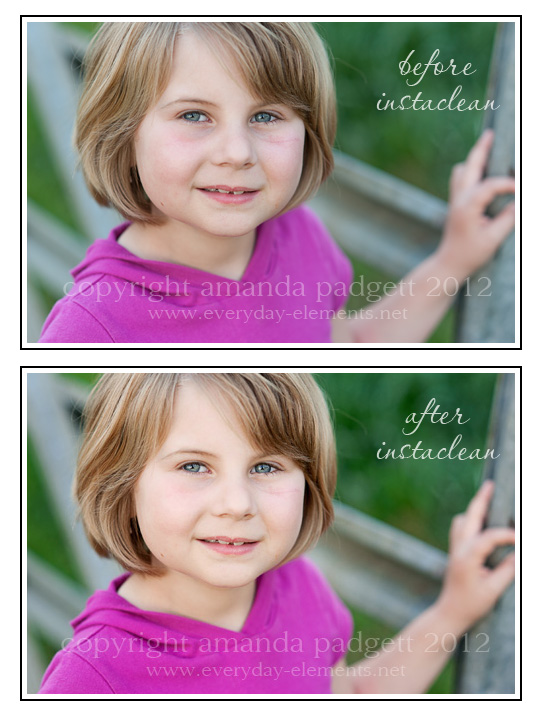
In April of last year (2012) I celebrated a milestone on Facebook by giving away a free cleaning action – InstaClean. I never had time to do a tutorial for it, so everyone just had to wing it, so here is the long overdue tutorial. (Thank you for your patience).
First let me state – InstaClean works in BOTH Photoshop Elements and Photoshop CS. It works on both Mac and PC computers. It just works. 😉
Did you miss seeing InstaClean? No worries! You can download it by clicking HERE.
Due to time constraints, this is mostly a video tutorial with a few screen prints to aid you. The video below will walk you through using InstaClean twice, once in PSE 11 and once in PSE 10 (because the interfaces look so different).
Here are a few tips for using actions:
- Either run the action on a duplicate of the image or always save it by doing “Save As” and renaming the image. Never, ever, never, ever overwrite the original file. Trust me.
- You can double click on each layer icon and the adjustment will open up for you to tweak, if you so choose.
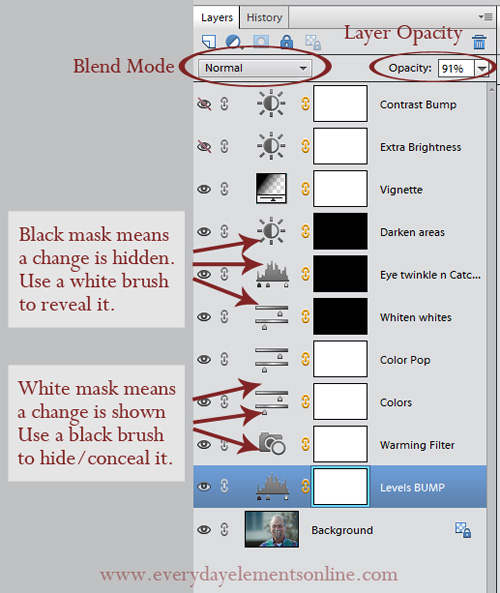
- Use the white/black masks to hide or reveal changes.
- Use the layer opacity to reduce how much of a change you see.
- Save the layers unflattened as a .psd file if you want to come back to it later.
- After you’re done, flatten the layers and save as a .jpg or .tiff – making sure NOT to overwrite the original file.
- InstaClean is a cleaning action, meaning it helps you get your image looking great but still like it came from the camera that way.
The image below is what the layers panel will look like after running InstaClean on an image.
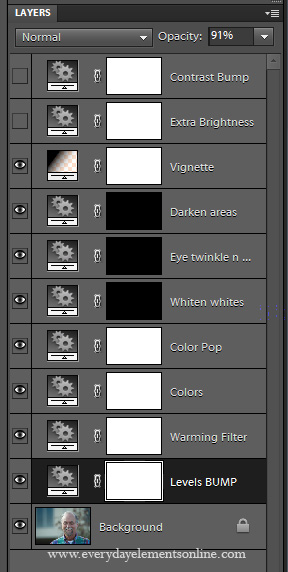
Below is a screen print of what the layers panel looks like after running InstaClean action in Photoshop Elements 10. If you have PSE 8 or 9, the panel will look very similar.
Questions you may have before or after watching the video and tutorials that may help:
- How to use masks?
- What is Levels and what is it good for?
- How to customize the expert or full edit workspace in PSE
The video that follows has two parts. The first half shows me using InstaClean in Photoshop Elements 11. Then I close PSE 11 and open Photoshop Elements 10. If you have PSE 10 or older, the new interface in PSE 11 may cause some confusion, so just hang on until the second half.
If you are reading this in a blog reader or via email and cannot view the video, simply click this LINK to go to Screencast.com where you can watch the tutorial.
Oh! Before I forget – I am doing two FREE one-hour webinars on PSE/Photoshop! One on actions and one on layers. The date and times are listed in the newsletter which went out today. If you missed it, click HERE. Follow the links in the newsletter to register for the webinars.


I downloaded this action last year when you offered it and I love it. Sometimes photos only need a small amount of “fixing” and this action gives it a finished polished look without overdoing it. 🙂 Thank you so much!!
Thank you SO much! I’m new to your blog and an amateur photographer, hoping to eventually make some money doing this!
One question: Do you have a tutorial somewhere regarding how to install these awesome actions you’ve provided?
Thanks again!
Thank you for the action and the tutorial. I finally understand the difference between white and black layers. 🙂