Once you have settled into using Photoshop Elements, you will eventually want to start creating new things like cards, textures, watermarks, blog graphics, etc. A wonderful tool to use when doing that is a custom brush. Today’s tutorial walks you through how to download, save and load custom brushes.
The steps shown below are from Windows 7, but they are exactly the same for XP and I believe Windows Vista. I am unsure of the exact steps for a Mac, but I believe they are very similar. The steps are for Photoshop Elements, but the process is very similar for Photoshop (CS5 and earlier).
If you want to find new brushes for your Photoshop Elements (or Photoshop), this LIST has several places that offer free or affordable brushes.
One of my Christmas gifts to EE readers was a set of five texture brushes, which was supposed to expire yesterday. I decided to make them a permanent freebie, so if you missed the giveaway, you can still download them.
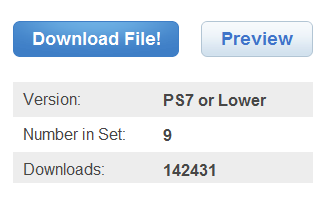
Step 1: Find a custom brush or brush set you would like to use, and click on the download link.
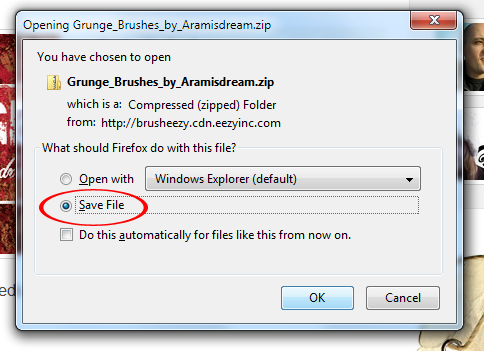
Step 2: When the pop-up box comes up, choose to save the file.
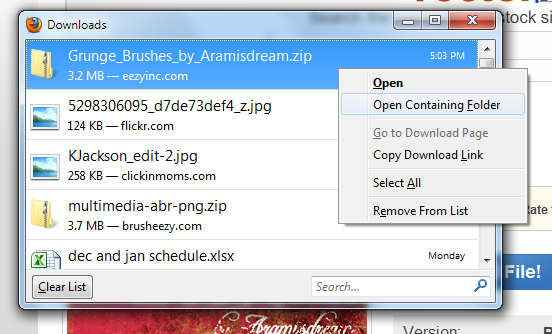
Step 3: Once the download is complete, right click on the file and choose “open containing folder.”
Step 4: Move the file to a folder you can easily locate on your computer. I have a folder on my Desktop that is for anything I might want to load into my PSE (actions, brushes, gradients, shapes, fonts and patterns).
I do not recommend saving them to your Brushes folder inside Elements as that can slow down the start up time for your PSE program as well as make your program run slower.
Below is my folder system, which needs a bit more organizing. 😉
Step 5: Go back to that “easy to locate folder” and locate the zip file. If you have a lot of files in that folder, sort by date and then it is easy to identify the one you just downloaded.
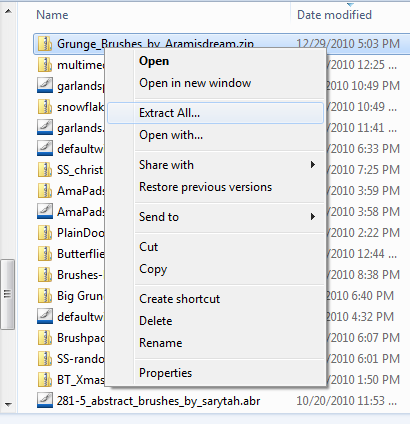
Step 6: Extract the contents from the zip file by right clicking on it and choosing “extract all files.”
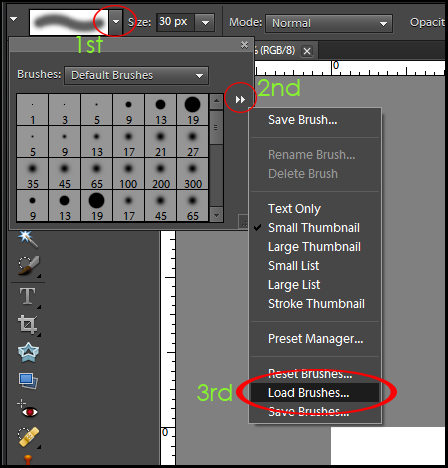
Step 7: To load the brush set in PSE, click on the arrow next to the brush stroke, then on the double arrows in the top right corner of the brush thumbnail box. Choose “load brushes.”
You can load brushes while Photoshop Elements is already running; they are not like actions that you have to load and then restart PSE.
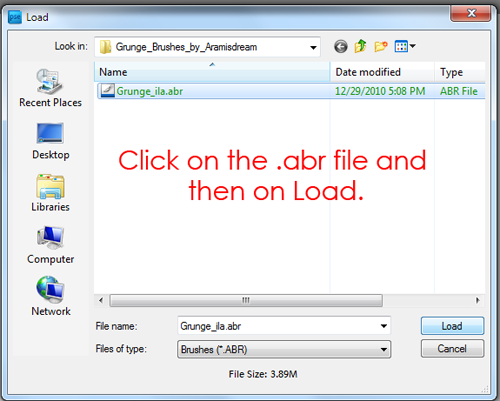
Step 8: Navigate to the folder that should be easy to locate on your computer and choose the .abr file.
I do have a tutorial coming on how to use the custom texture brushes I gave you over the weekend. After that will be how to create custom brushes and save them in their own sets.
You can print this tutorial by clicking on the Joliprint button in the bottom left-hand corner of this post.
For those who like to see the steps in action, below is a short video tutorial (using different brushes). If you cannot view the video here for some reason, click HERE to watch it at ScreenCast.com.




Thanks Amanda, for a mac, I just download. Click save when the window pops up that says it is a binary file. The file saves right onto my desktop as an abr. No need to unzip. I place right in my folder where I can find it. The install was easy right in PSE just like you said. Can’t wait to see how you use these. I noticed that if I had the brush really big and click on a blank file it fills it giving a texture to it. Very fun!
Hey Amanda,
Your tutorials are so good. Eventhough it takes me watching several times, I finally get it.
I would love to take a course from you and Rita (CoffeeShop) on maintaining a blog design. I don’t know HTML language so I am not sure if I am teachable.
Thanks for all that you do for us out here.
Charlotte
Super easy and helpful! Thanks, lady! 🙂 I’ve had some fun finding and playing with brushes today… nothing to share, but just goofing around a bit to learn!
Oh, and btw, I love your new welcome box on the upper right – and adorable pic! 🙂
Cool! I will have to give this a try. I think this would be a great way to get a little more texture into images. =]
Ah!A lot simpler than what I was making it out to be, it’s just like modding games, just put things into the correct folder paths.I always wondered if I could do that with elements. Question, can you use things made for say CS5 brushes and use them with elements?Or would that not work?I see a lot of nice brush sets that people have made.
I load it, but then when I try to change to different brushes, the one’s I just downloaded go away. I tried saving it and a whole bunch of things but nothing works. Any advise?
This is a great tutorial, however I had the same problem with the brushes being temporary. This video (at 1:26) shows you how to make the brushes permanent.
http://www.youtube.com/watch?v=qKu3jsUknaY
Hi there mates, nice post and good arguments commented at thiis place, I am genuinely enjoying by these.
Thank you for the tutorial, and thanks for the great brushes.
Thank you so much for the great tutorial. I really do appreciate the visual because I learn by watching.
I want to know how to erase these when you are through with them.
Best Regards,
Carla Jo