Ever want a quick (and healthy for your image) way to lighten or darken your pictures? Using an empty adjustment layer and the screen or multiply blend modes may be all you need.
For the more intermediate PSE/PS user, you may be doing a duplicate copy (control +j) and changing the blend mode, but this is a healthier way to do it, a “non-destructive” way to edit.
Please Note: These EXACT steps can be taken in Photoshop CS5 and earlier versions.
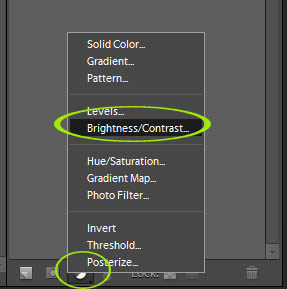
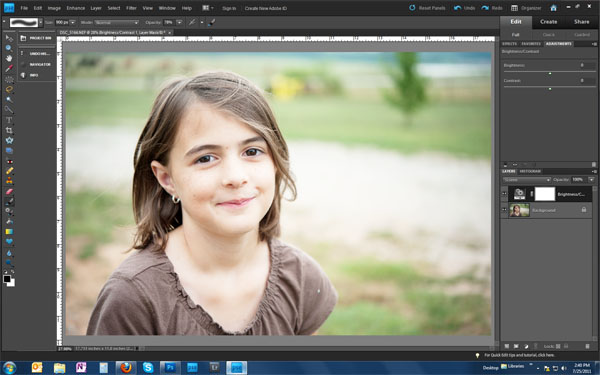
Step 1: Click on the half white/half black circle in your Layers palette (at bottom for PSE 8 & 9, at top for PSE 6 & 7), and choose Brightness/Contrast, but do not move the sliders for that adjustment, just leave it alone.
Step 2: To brighten, click on the word ‘Normal’ right below the word ‘Layers’ in your Layers palette. This will create a drop down menu. Choose Screen and your image will suddenly be much brighter.
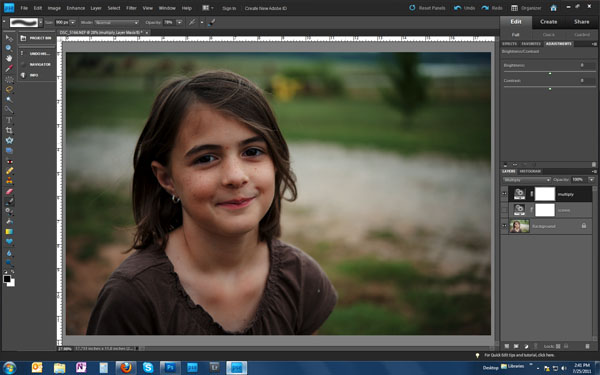
Step 3: To darken, click on the word ‘Normal’ right below the word ‘Layers’ in your Layers palette. This will create a drop down menu. Choose Multiply and your image will suddenly be much darker.
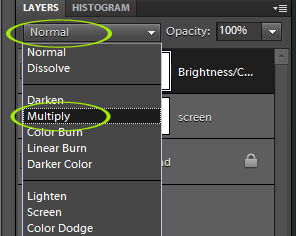
Step 4: Adjust your layer opacity to suit your image. Often times I invert this layers and brush only where I need it.
The video tutorial below shows you the steps listed above plus takes it further and shows inverting and applying selectively on areas as needed.






I also just CTL J and add a new layer, then click the arrow above them and choose the blending mode I want, adjust opacity, and flatten. Maybe a little faster but love knowing new ways!!! 🙂 Hope you are ok from your fall!!! That is terrible!!!
Blessings!
Sharon,
Actually, doing an empty adjustment layer is healthier for your file than a duplicate layer. When you duplicate the background you’re duplicating all those pixels again, making the file larger. Using an adjustment layer is a more “non-destructive” type of edit.
Thank you Amanda!! Always extremely helpful tips and tricks!!!
This is a great tip. Very easy – I just tried it. Thanks so much.
My best- Diane
Great tutorial. What program do you use to record your tutorials?
Geri, thank you. I use Camtasia for a PC on my PC and Camtasia for a Mac on the Macbook. Sounds redundant, they they really are like two different program, very, very different. They have a free screen capture program called Jing that I used prior to December 2010, but the videos can only be 5 min and sometimes missed recording brush strokes and such.
Thanks, Amanda!!
~ingrid
What an awesome (and pleasantly simple) tip! I love these!