Just recently I received two requests asking me to explain how to get a color logo on an image. The PSE/PS users had made watermark brushes with their logos, but when you make the logo a brush, it can only be applied as one color; you lose the specific colors in the logo.
First things first, the logo needs to have a transparent background and be saved as a .png file type. I will illustrate that in the video tutorial, but for now, this is what it should look like (but envision that my blog post area isn’t white).
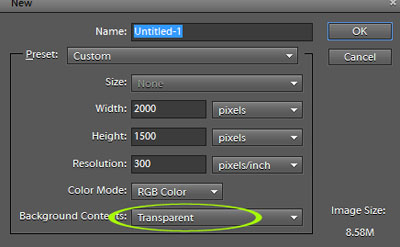
If you are making your own logo, you will be given the choice to make the background transparent when you first create the file (File/New/Blank File).
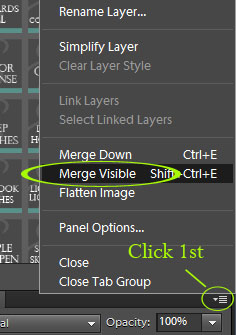
In order to keep it transparent, after you have the logo just as you want it, choose MERGE VISIBLE. If you flatten instead, the background will turn white. Save the file as a .png file format so the background will be transparent still. Save it to a folder in your Pictures folder or somewhere else that you will not forget about.
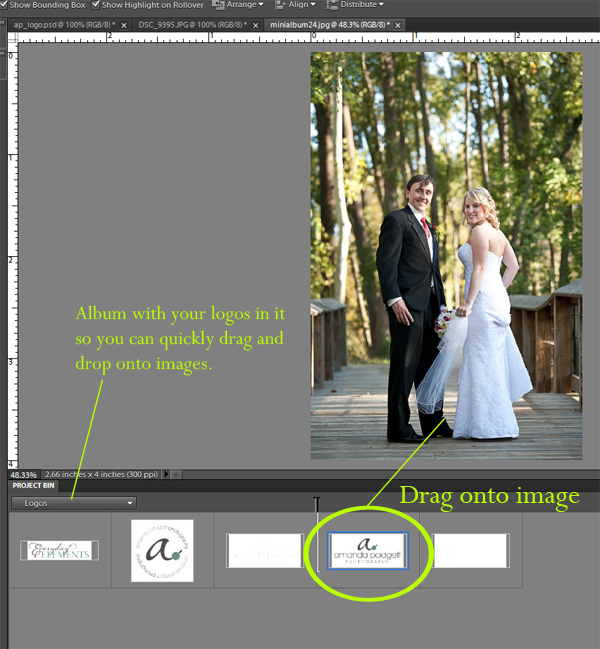
Next, make an album of your logo or logos so that you can easily access it from your Project Bin without having to go through the File/Open process each time you want it.
Then, when you have an image you want to put the logo on, just go to the logo album in your Project Bin, and then drag it onto your image and use the move tool to move and resize it to suit the image.
The result:
It really is that easy.
If you do not have a logo and would love a simple and easy watermark, try following my watermark brush tutorial.
Below is a video tutorial showing how to create a transparent logo, plus creating the album and then accessing and applying the logo in full edit mode of Photoshop Elements.


I love your lessons and tutorials, but unfortunately I am not able to see the images and video on my iPad. I can hear it, however. Thanks.
It works now. Sorry.
Thanks for this tute, Amanda. I was struggling with this earlier this week and just gave up. Now I know what to do. You are the best!
Diane
I am so excite! I just found your web site and blog. I will be spending a lot of time visiting learning lots of new stuff about my Photosho Elements. Thank you for your awesome website.
I can’t see where you are clicking to save when you mention lines and a triangle 🙁
Karen,
Answering months late, but doing so for those who might be reading later.
If you look at the second screen print, you’ll see those lines/triangle circled and the words “Click 1st” next to it. That’s what I was referring too.
Do you know if it is possible to save the multi-color watermark as a brush? Thanks so much for the tutorial.
Selana,
I’m answering this VERY late, but answering it so that others reading later can see the answer.
Brushes can only be one color. The only way to get a multi-colored logo on the images is to add it as a transparent png, as I did in the tutorial.
Great question!
Amanda
I can follow all the way to the Merge Visible. I’m on a PC, would that have anything to do with it? Would love to keep my color in my logos =) Thanks for the instructions!
Awesome! Now I just have to get a logo!
WooHoo! As always Amanda, you ROCK! I have been looking for something like this – thank you!!!
Thanks, Michelle! So glad it came at a good time and hopefully will help.
Thanks for this tut Amanda. Very helpful and you did a wonderful job explaining.