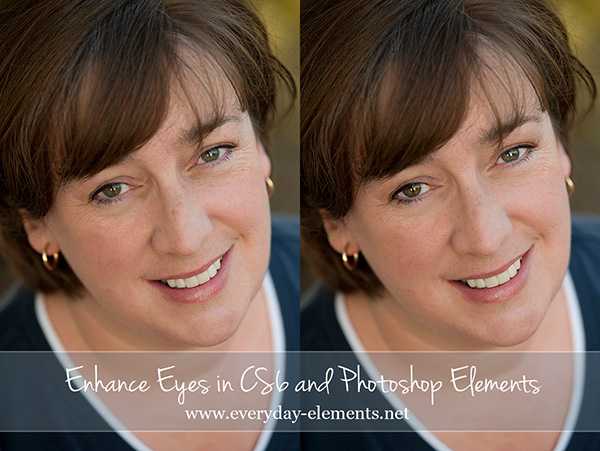
Today we are talking about the eyes – “the window to the soul.” You want the eyes to really stand out, for the catchlights to shine, so the eyes will come alive! Here are six easy steps to enhance the eyes and eye area in Photoshop and Photoshop Elements
Please note that 100% of these steps can be done in PSE and Photoshop CS. Please don’t let the background of the program make you think you can do this in your program.
I am building on the picture I used for a color correction post last week, so the only edits done to this image were for the white balance and color casts. I will continue to use this picture for the next few editing tutorials.
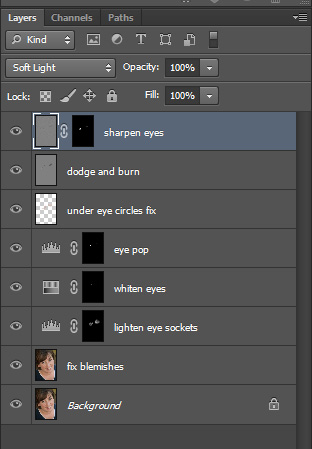
Now, don’t look at the layers below and think that this will be too complicated for you, if you are newer to PSE or Photoshop CS, because they are all very simply adjustments. If you watch the video tutorial below, I walk you through what I do, and why, for each layer.
Three of the steps I do in this tutorial have been shown before:
If you notice, there are seven layers, but I said six steps above. I did not count the fix blemishes layer because that is not one that everyone will have to use; it really depends on the subject.
I am pretty sure a question about the radius of the High Pass filter will be asked, so let me clarify now. I used a high radius of 5 because I am wanting to try to refocus an eye that is just slightly soft. A lower radius would not help as much, so I took it to 5.
Please note – you cannot make out-of-focus picture become in-focus by doing this trick. If the eyes are barely soft, meaning really almost in-focus, then it works to just make them a bit more sharp. What can you do for an OOF (out of focus) picture? Not much, rather than take it again.


I always forget how to do the stamp layer! Thanks for the reminder. 🙂
Thank you so much for this tutorial. The eyes really do “make” the portrait, don’t they 😉
You always amaze me!
Great tutorial Amanda!!! I love the pace you go at…not too fast, not to slow. And I REALLY appreciate that you show how to do everything without actions. I learn so much more versus how to push play and the adjust an opacity slider.
I learn soooo much from you! Thx!